5 min. reading
Yulii Cherevko
CEO paintit.ai
Designing a nursery is one of the most personal projects you can undertake in your home. It’s a space built on anticipation and empathy. The challenge is creating a room that feels serene and stylish while being incredibly practical and safe. Finding the right nursery layout ideas is the first step to achieving that perfect balance. With Americans spending over $600 billion each year on home improvements, according to the Joint Center for Housing Studies of Harvard University, getting this foundational room right is a meaningful investment. Instead of guessing with floor plans and swatches, you can use a tool like our Paintit.ai tool to upload a photo of your actual room and instantly visualize how different layouts and furniture will look and feel. It really removes the uncertainty.
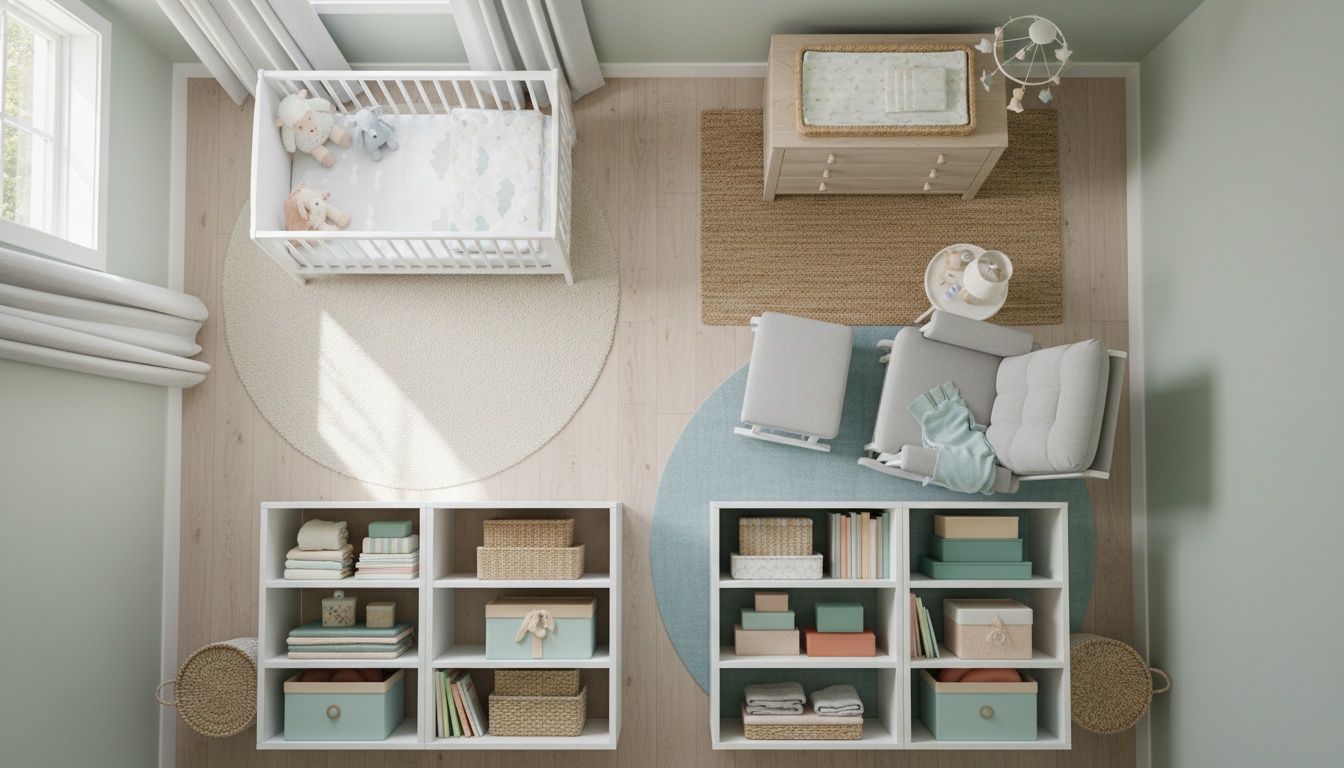
The best nursery layout isn't just about where the crib goes; it's about creating an intuitive workflow. A well-designed nursery is organized into distinct zones, each with a specific purpose. This zoning approach makes navigating daily tasks—from middle-of-the-night feedings to morning changes—feel more organized and less chaotic. Thinking in zones helps you determine the most logical nursery furniture placement for your space.
| Zone | Purpose | Key Furniture | Why It Works |
|---|---|---|---|
| Sleep Zone | A calm, safe area for rest. | Crib, Bassinet | Creates a protected, distraction-free space to promote healthy sleep. |
| Changing Zone | An efficient, hygienic spot for diaper changes. | Changing table or dresser with a topper, diaper pail | Keeps all necessary supplies within arm’s reach for safe, quick changes. |
| Feeding Zone | A comfortable nook for feeding and bonding. | Glider or rocking chair, small side table, ottoman | Provides ergonomic support and a soothing environment for both parent and baby. |
| Storage Zone | Organized space for clothes, toys, and supplies. | Dresser, closet organizers, bookshelves, baskets | Prevents clutter, which is a key to a serene and safe room. |
| Play Zone | A stimulating area for development and fun. | Soft rug or play mat, low, accessible toy storage | Defines a safe space for floor time and encourages independent play. |
Before you consider aesthetics, safety must guide every decision. An unsafe layout can pose serious risks. Based on Paintit.ai user data, we've observed that while users focus on style, they often overlook the technical aspects of safe placement. For instance, few users specify room dimensions, making it hard to judge clearances. This is where visualization becomes a powerful safety tool.
Here are the non-negotiable rules for your baby nursery layout:
You can test these placements and ensure your planned layout adheres to safety guidelines long before you move a single piece of furniture, by using our AI virtual staging tool.
Here are ten practical nursery setup ideas that you can adapt to your room’s size and shape. Each one focuses on a different priority, from maximizing small spaces to creating a flexible, long-lasting design.
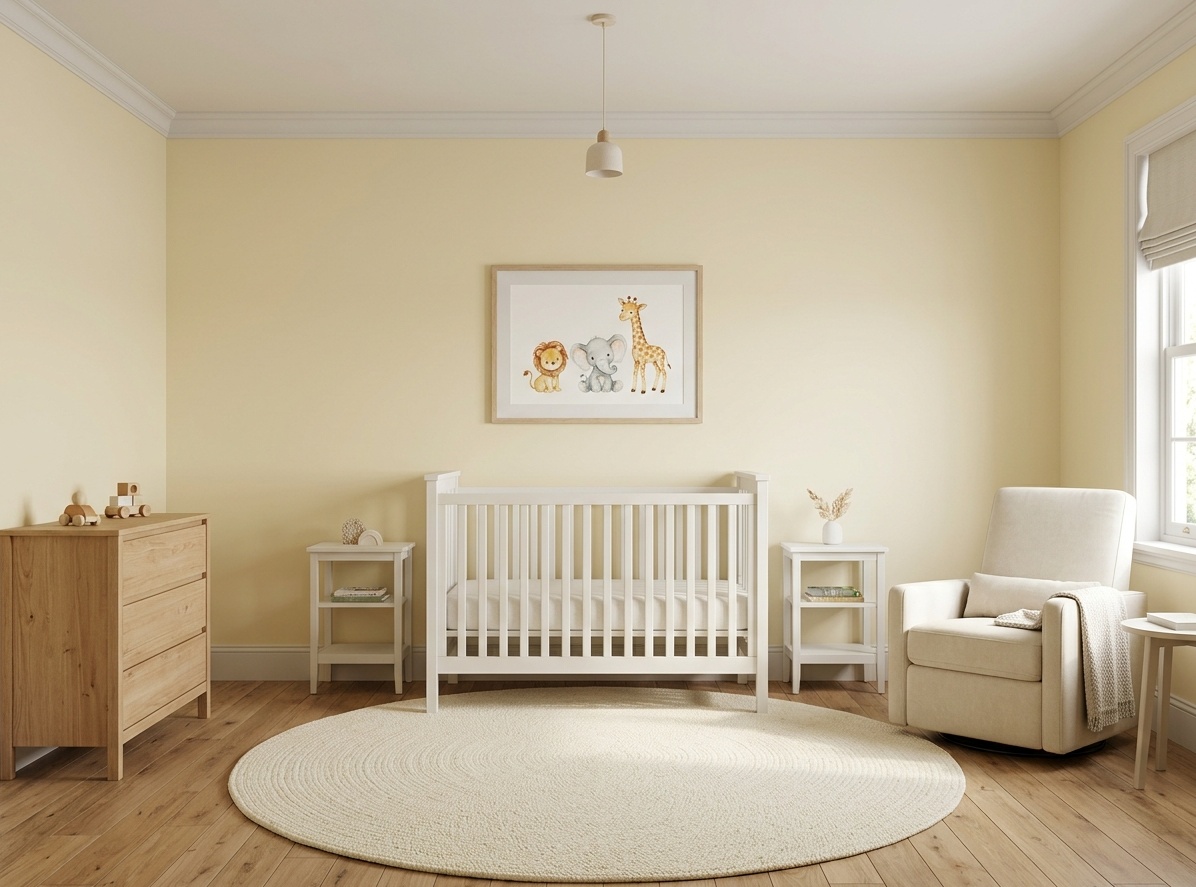
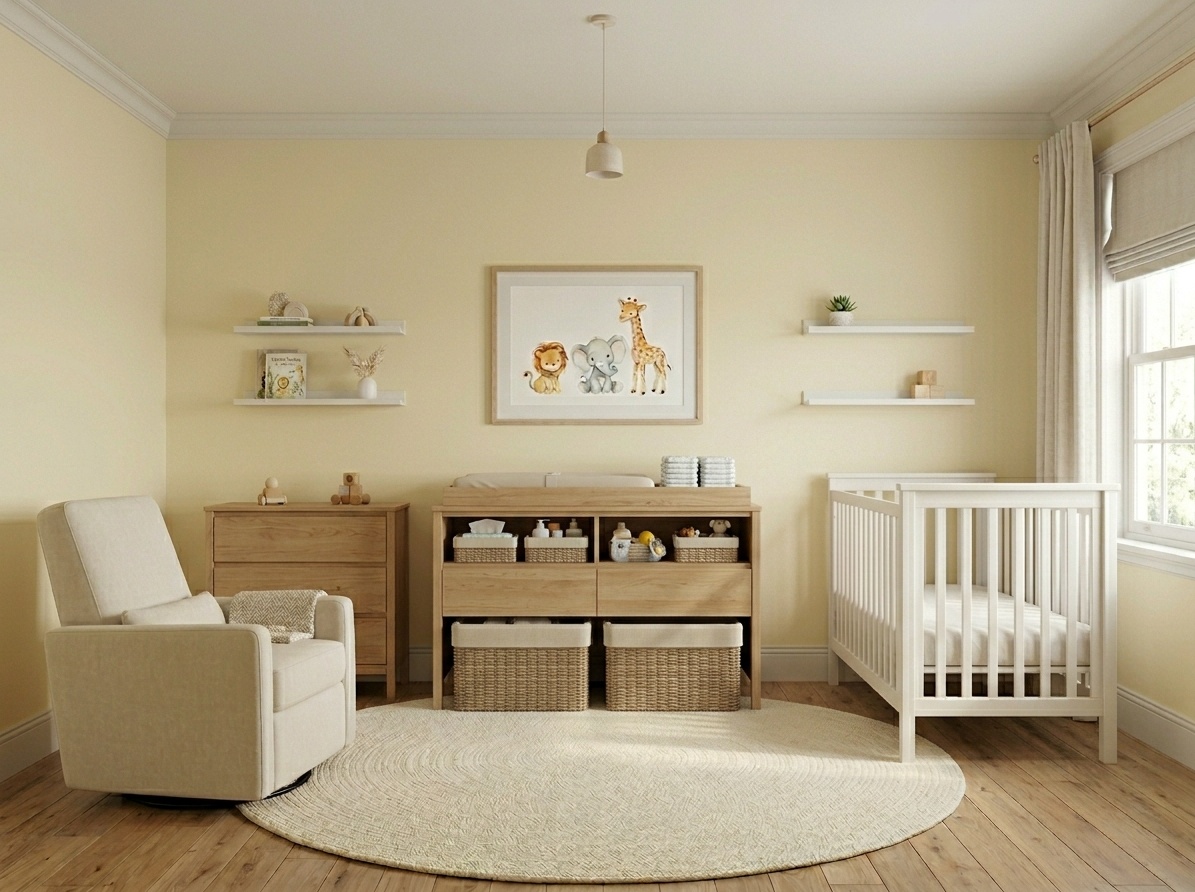
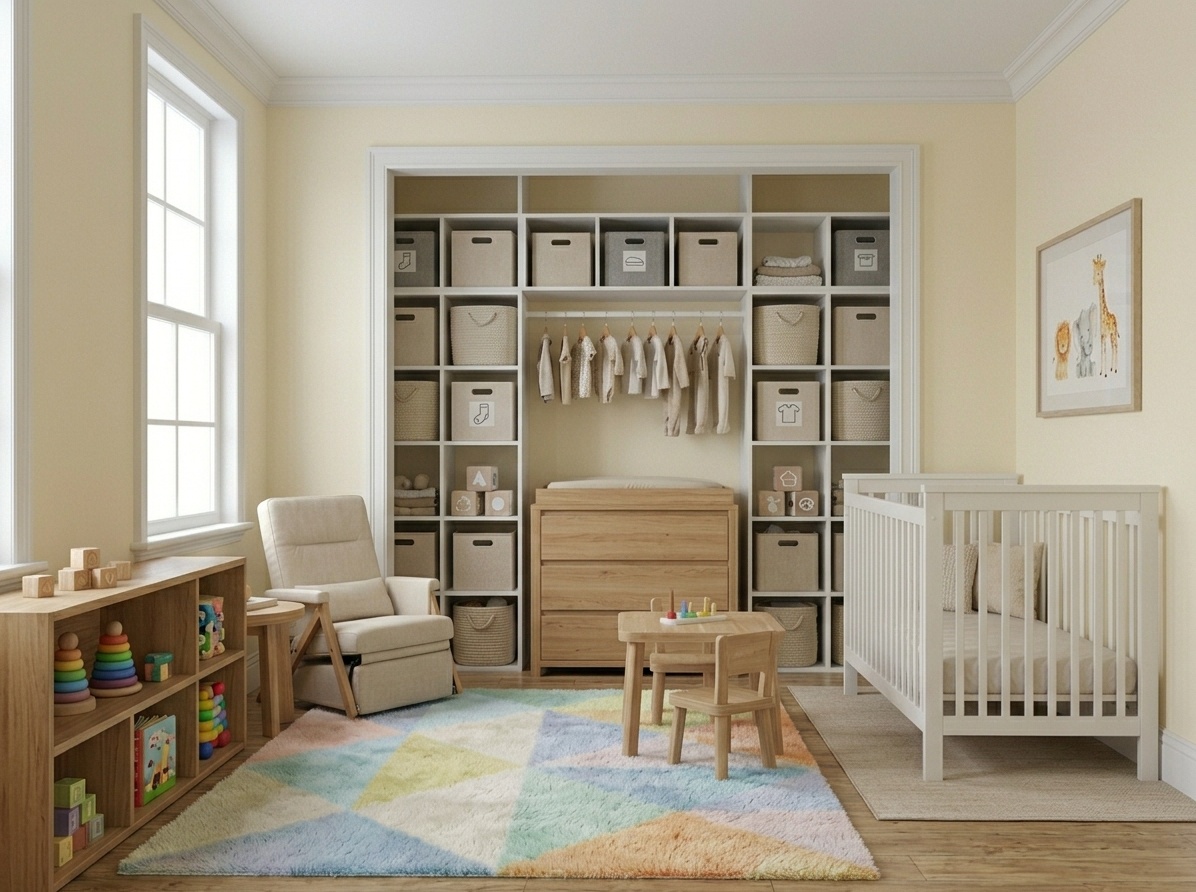
This timeless layout places the crib as the focal point, centered on the longest, uninterrupted wall. It creates a sense of balance and calm. The changing table and glider are typically placed on adjacent or opposite walls, creating a symmetrical and intuitive flow.
Ideal for small rooms, this nursery set up ideas involves tucking the crib into a corner. This frees up valuable wall and floor space for other essentials like a compact dresser or a small glider. It can also create a cozy, den-like feeling for the baby.
For ultimate convenience, place the changing station (often a dresser with a topper) on the same wall or an adjacent wall to the crib. This layout minimizes steps during late-night changes, making the routine smoother and quicker.
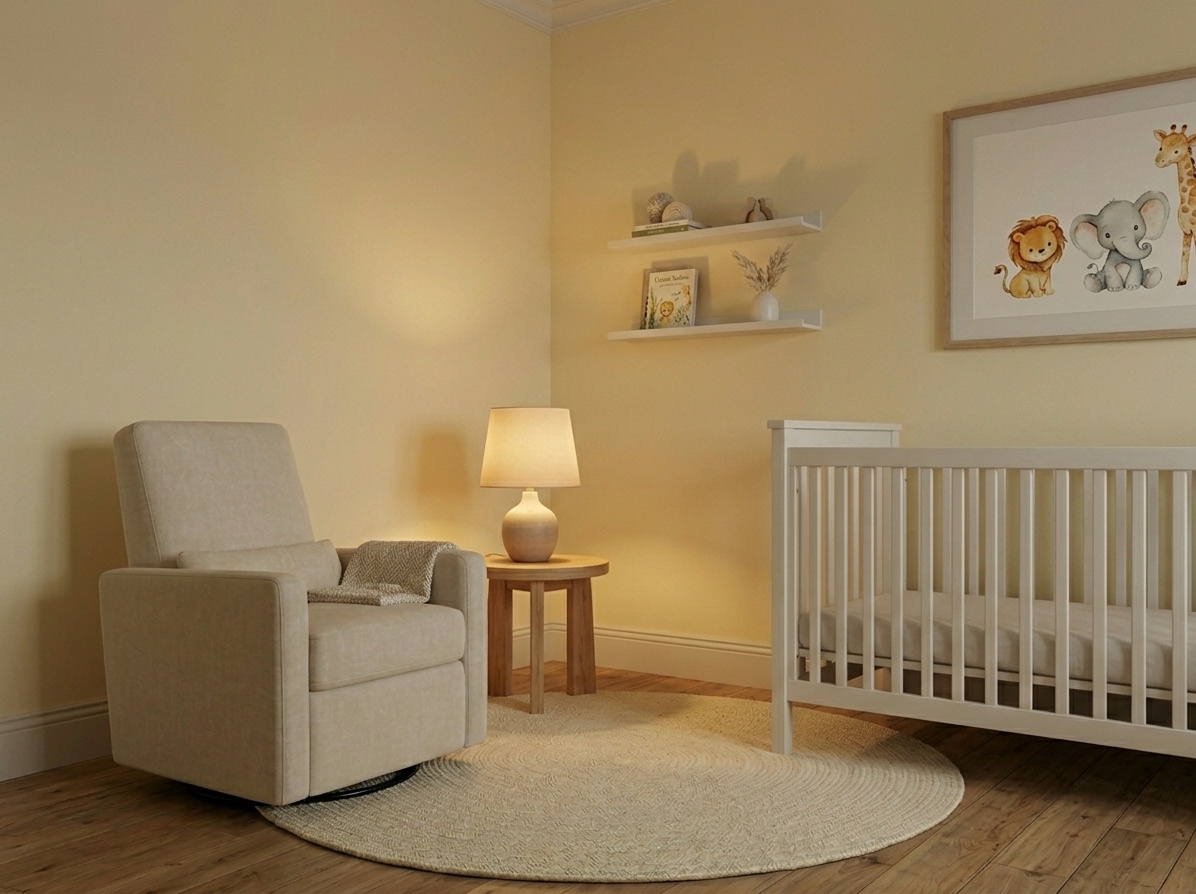
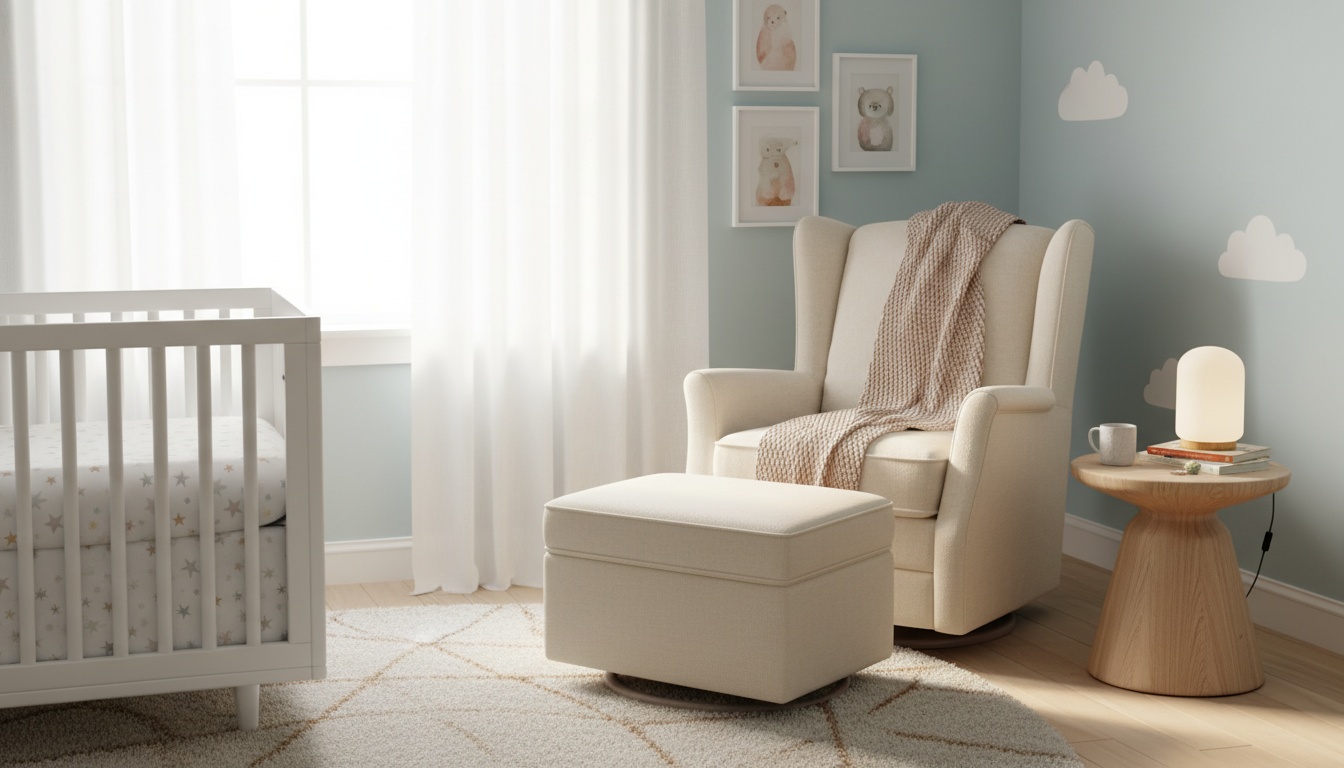
Placing the glider or rocking chair right next to the crib creates an intimate zone for feeding, cuddling, and soothing. This layout makes it easy to transfer a sleeping baby from your arms to the crib with minimal disruption.
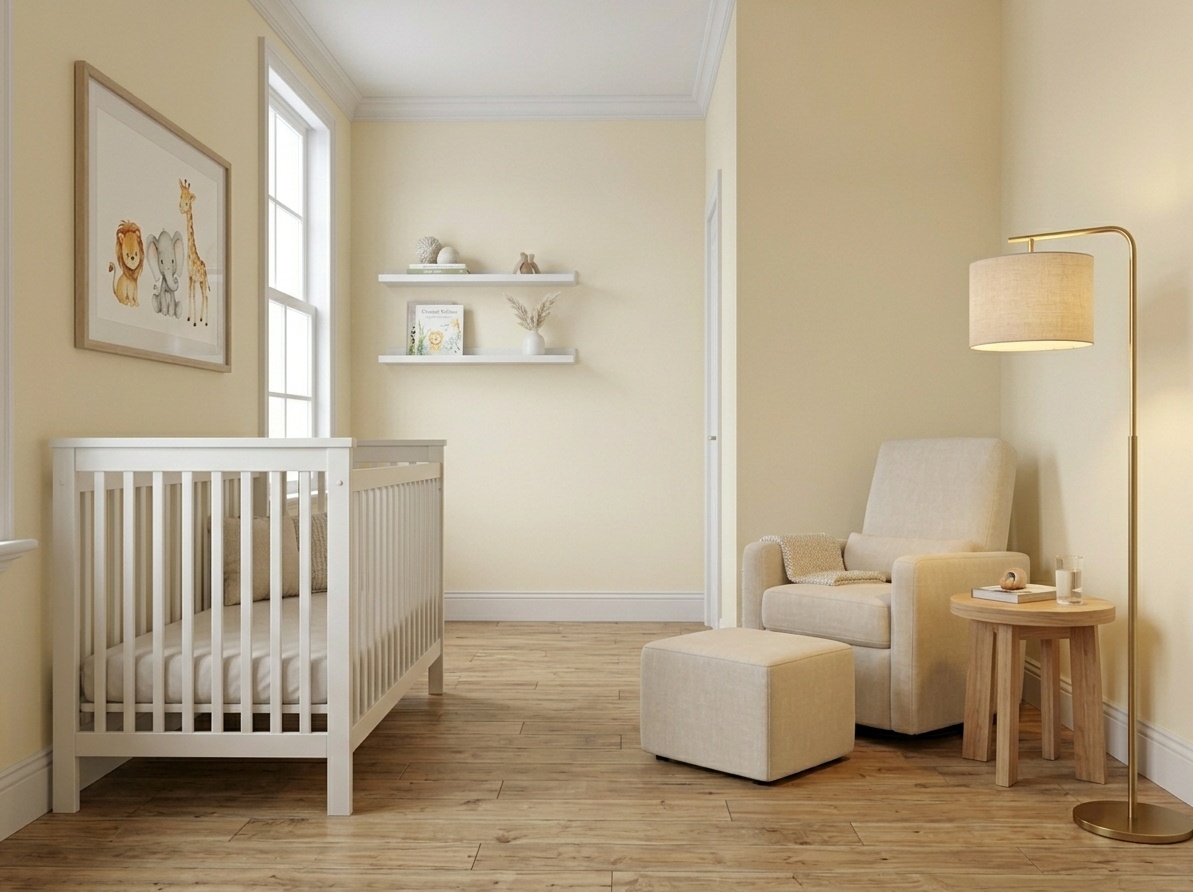
If you have the space, creating a dedicated feeding station on the wall opposite the crib provides a clear separation between sleep and feeding activities. This can help establish routines and gives you a comfortable spot with a clear view of the crib.
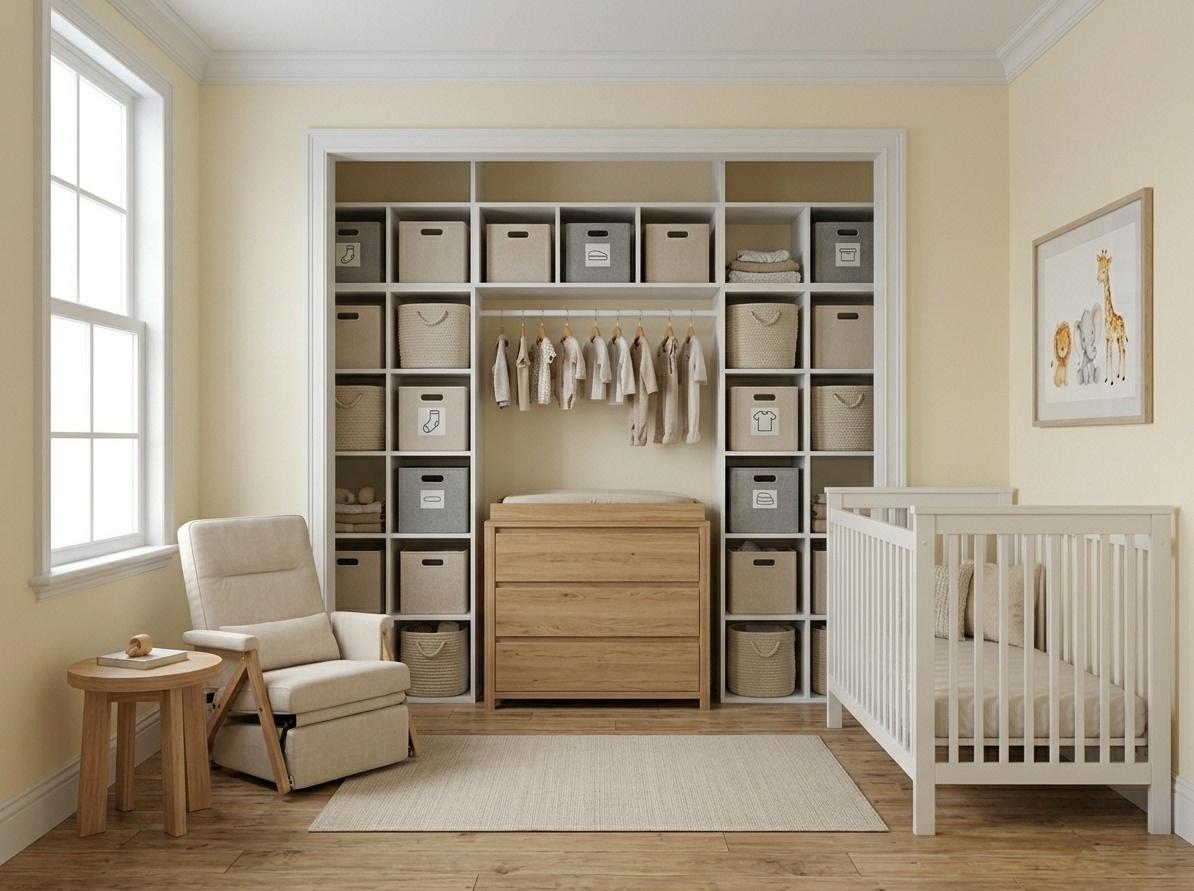
An excellent trick for tiny nurseries is to remove the dresser from the main room entirely. If your closet is large enough, you can place a low dresser inside or even install a changing station within it. This is one of the most effective nursery layout strategies to maximize floor space.
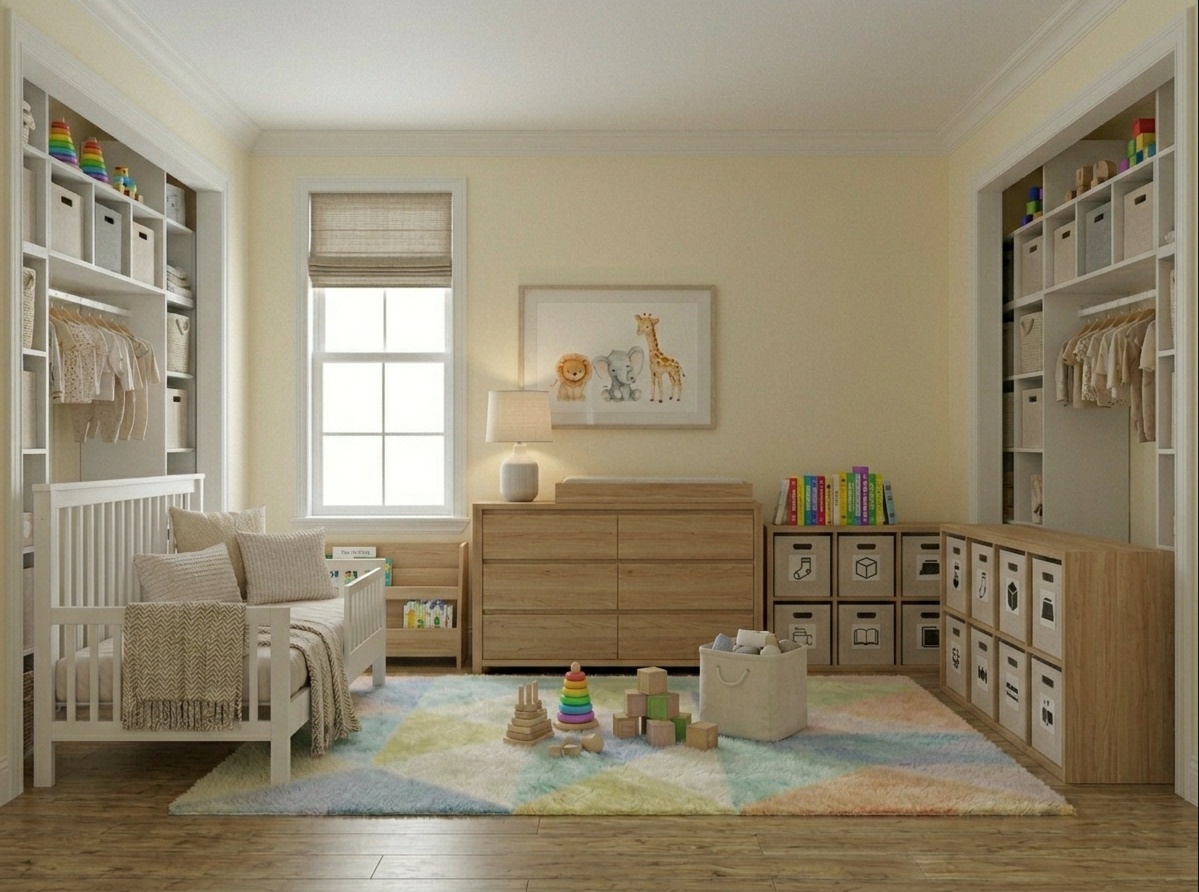
As your baby grows, play becomes central. Dedicate one corner of the room as a play zone with a soft rug, low shelving for toys, and open space for floor time. This contains the clutter and separates stimulating activities from the calm sleep area.
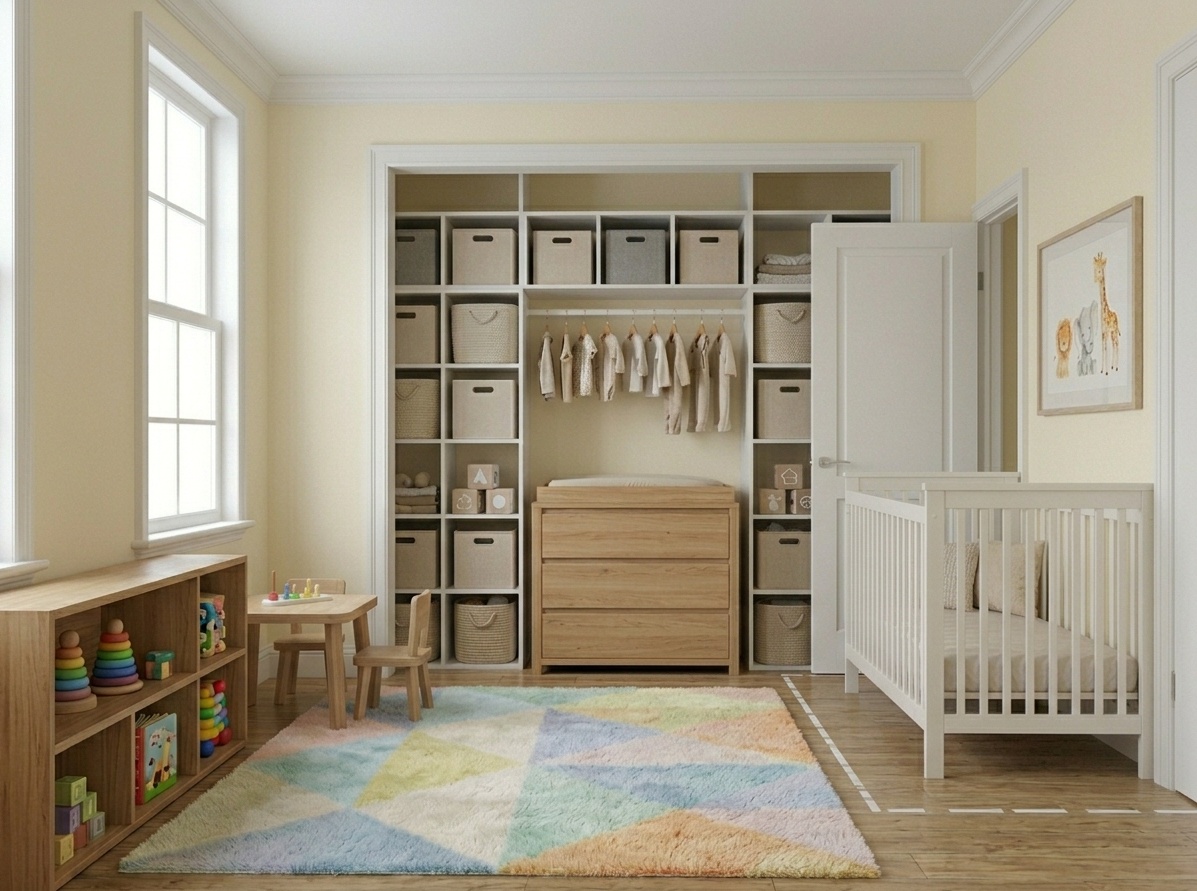
Placing the crib on the same wall as the door allows you to peek in on your baby without fully entering and potentially waking them. Just be sure the crib is far enough away that the door cannot swing open and hit it. Learning how to arrange a nursery this way is a game of inches.

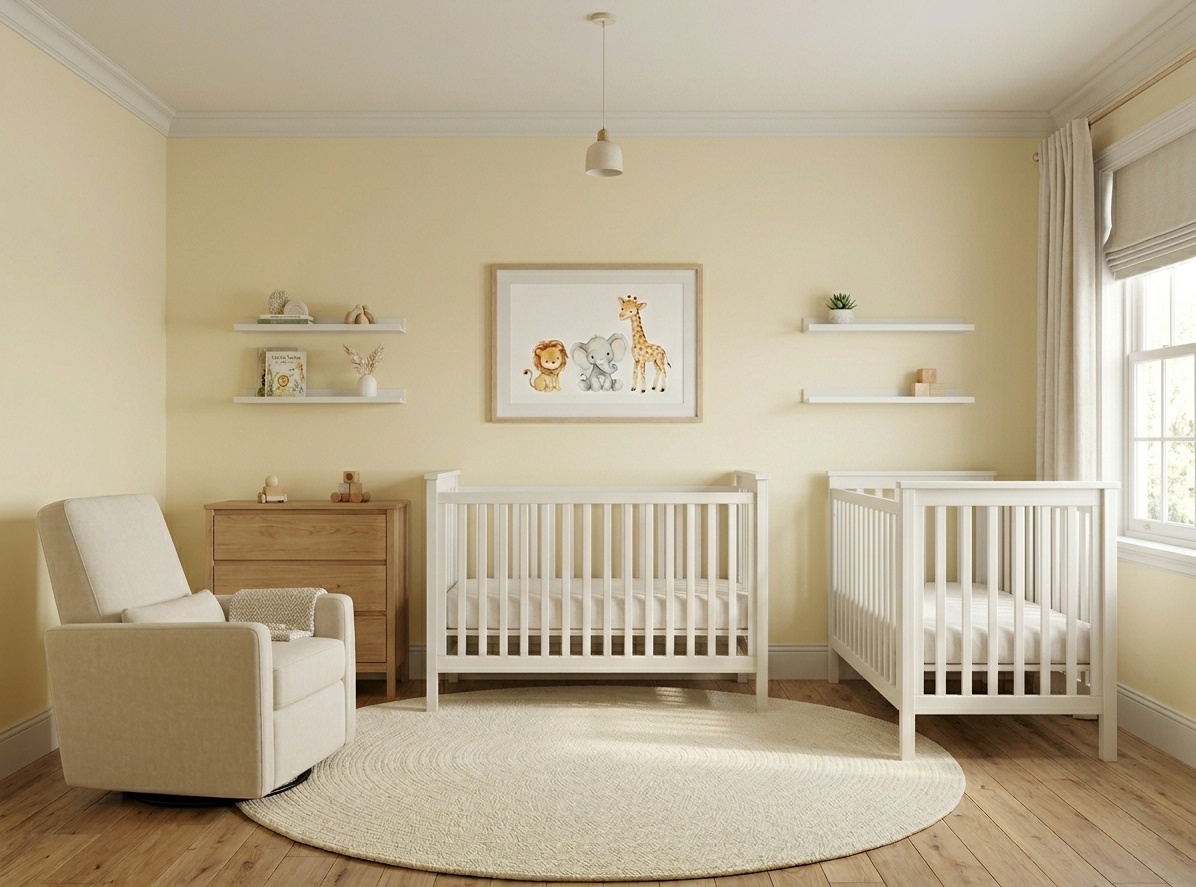
When designing for two, symmetry is your friend. Place two cribs side-by-side on a long wall, or on opposite walls for a mirrored effect. A shared changing station and feeding area can be placed centrally to serve both babies efficiently.
This layout is about long-term thinking. Use a convertible crib that turns into a toddler bed, a dresser that can lose its changing topper, and modular storage. The initial how to arrange nursery furniture plan should already consider its next life as a child’s room.
Even with the best intentions, it’s easy to make a few missteps. Based on Paintit.ai data, we know a top user concern is avoiding clutter (8.8% of user prompts mention "no clutter"). Many common layout mistakes lead directly to that cluttered feeling. Here’s a quick guide to fixing them.
| Problem | Likely Cause | Fast Fix | Paintit Try-On Test |
|---|---|---|---|
| Blocked Pathways | Furniture is too large for the room or placed awkwardly. | Opt for smaller-scale pieces or try a cornered layout to open up the floor. | Drag and drop furniture to ensure at least 3 feet of clear walkway to key areas. |
| Poor Lighting for Tasks | A single, harsh overhead light. | Layer lighting: add a dimmable floor lamp by the glider and a soft task light near the changer. | Add virtual lamps to your render to see how they illuminate different zones. |
| Inefficient Flow | Key zones (crib, changer) are too far apart. | Re-arrange furniture to create a "work triangle" between the crib, changer, and door. | Test the "Efficiency Hub" or "Soothing Nook" layouts to feel the difference. |
| Wasted Vertical Space | Not using the walls for storage in a small room. | Install floating shelves or tall, narrow bookcases. | Use the 'Add Object' feature to place virtual shelves and see how they declutter the floor. |
Pinterest boards are great for inspiration, but they don’t show you how a specific nursery furniture layout will work with your room’s unique dimensions, lighting, and existing features. This is where the guesswork and anxiety can set in. At Paintit.ai, we’ve found that design is an iterative process; users often refine their ideas through multiple steps to get it right.
Instead of trying to imagine it, you can see it. Our intuitive AI room design tool lets you bridge the gap between idea and reality.
Here’s the simple workflow:
This process gives you the confidence to move forward with a plan that you know works for your actual space. The way you can do this is explained in detail, as the process is similar for any room. While AI renders are powerful previews, always remember that real-world lighting can slightly alter how colors and finishes appear.
Safety is always the number one factor. This includes placing the crib on a safe wall away from hazards, anchoring all heavy furniture to prevent tipping, and ensuring clear pathways. Once safety is addressed, functionality and flow become the next priorities.
Use light paint colors, incorporate a mirror to reflect light, and choose furniture with legs to create a sense of openness. Vertical storage like floating shelves draws the eye upward, and a minimalist approach to decor will prevent the space from feeling crowded.
The absolute essentials are a safe crib for sleeping, a changing station (which can be a dedicated table or a dresser with a secure changing pad), and a comfortable chair or glider for feeding and soothing. Adequate storage is also crucial.
Start with a practical layout that prioritizes a safe and functional workflow. Once you have the core furniture placed correctly, you can layer in style through textiles (rugs, curtains, bedding), wall color, art, and decor. Choose durable, easy-to-clean materials that fit your aesthetic.
No, it is not recommended. Cords from blinds or curtains pose a strangulation hazard, drafts can affect the baby's temperature, and direct sunlight can be too harsh. Always place the crib against a solid, interior wall.
Paintit.ai lets you upload a photo of your room and virtually test different layouts. You can arrange furniture, see how different pieces fit to scale, check for clear pathways, and experiment with colors and styles, all before you buy or move anything. It helps you make confident decisions.
Creating a nursery is a journey of preparing a space for a new life. A successful design is one that supports your daily rhythm, ensures your baby’s safety, and reflects your family’s personal style. The right nursery layout ideas are the foundation, providing a blueprint for a room that is both beautiful and functional.
Don’t let uncertainty hold you back. The process of how to arrange a nursery should be joyful, not stressful. By using intuitive tools to visualize your ideas, you can move from a vague concept to a clear, actionable plan. You can test the flow, confirm the scale, and build a space that feels just right, creating a welcoming, empathetic, and perfectly practical room for your new arrival.


