4 min. reading

Yulii Cherevko
CEO paintit.ai
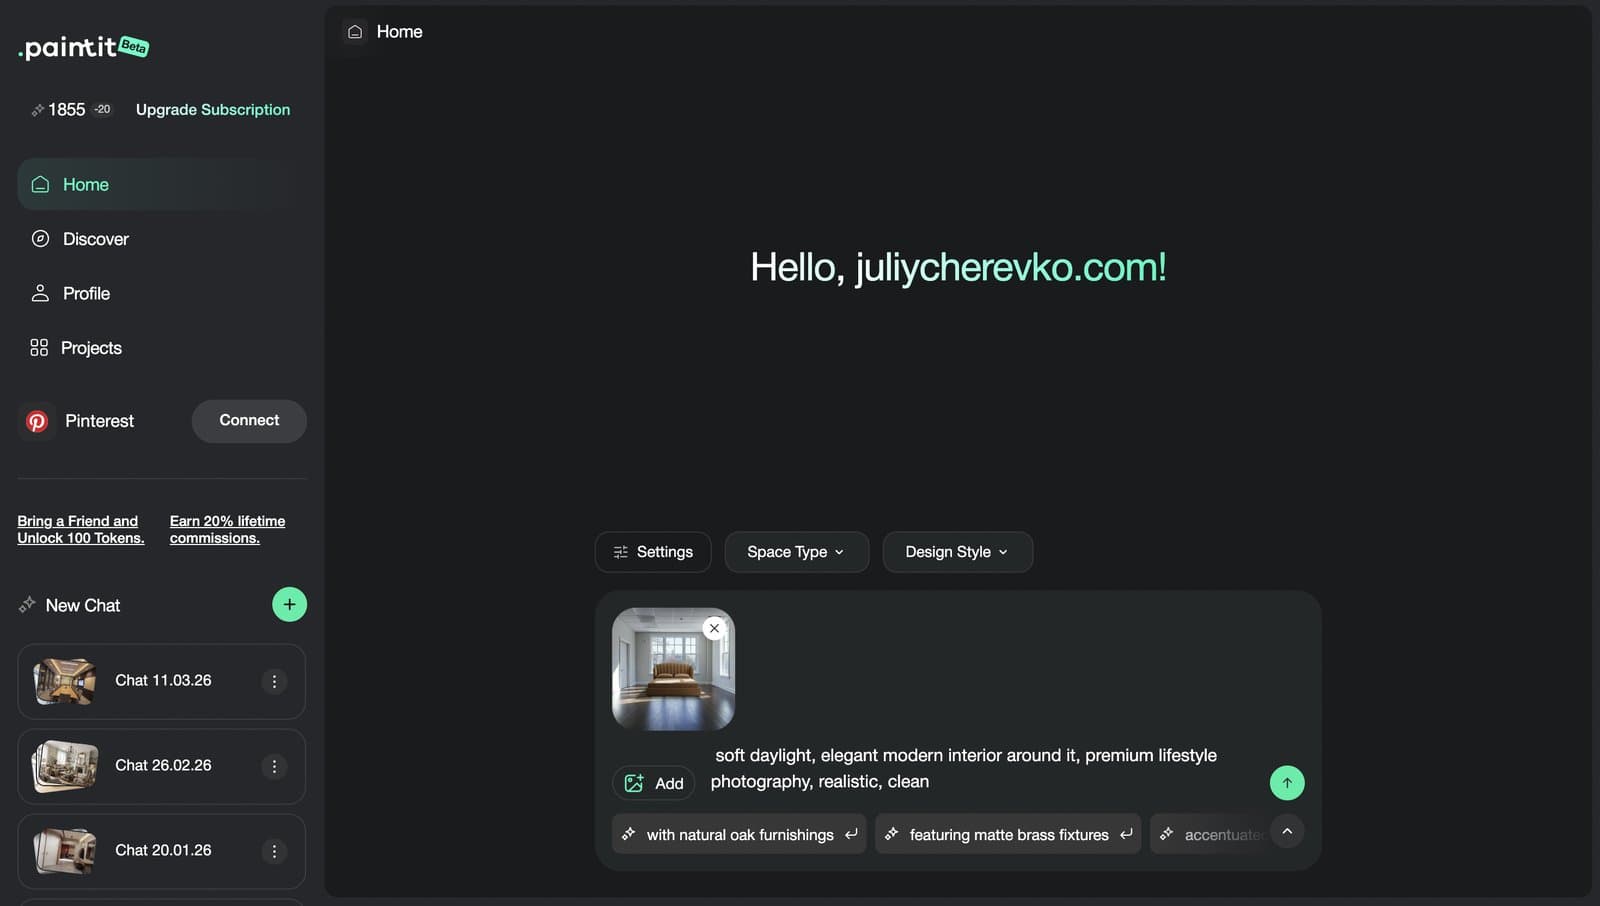
Better AI interior design results rarely come from one perfect sentence.
They usually come from a clearer workflow: the right room photo, the right reference images, a focused prompt, a sensible detail level, and a clean chat thread that does not mix five different design directions at once.
Paintit.ai Chat can help you explore a kitchen update, test a room redesign, prepare client options, refresh rental listing photos, compare material choices, or create a virtual staging direction. But the chat works best when you guide it like a design assistant, not like a random image generator.
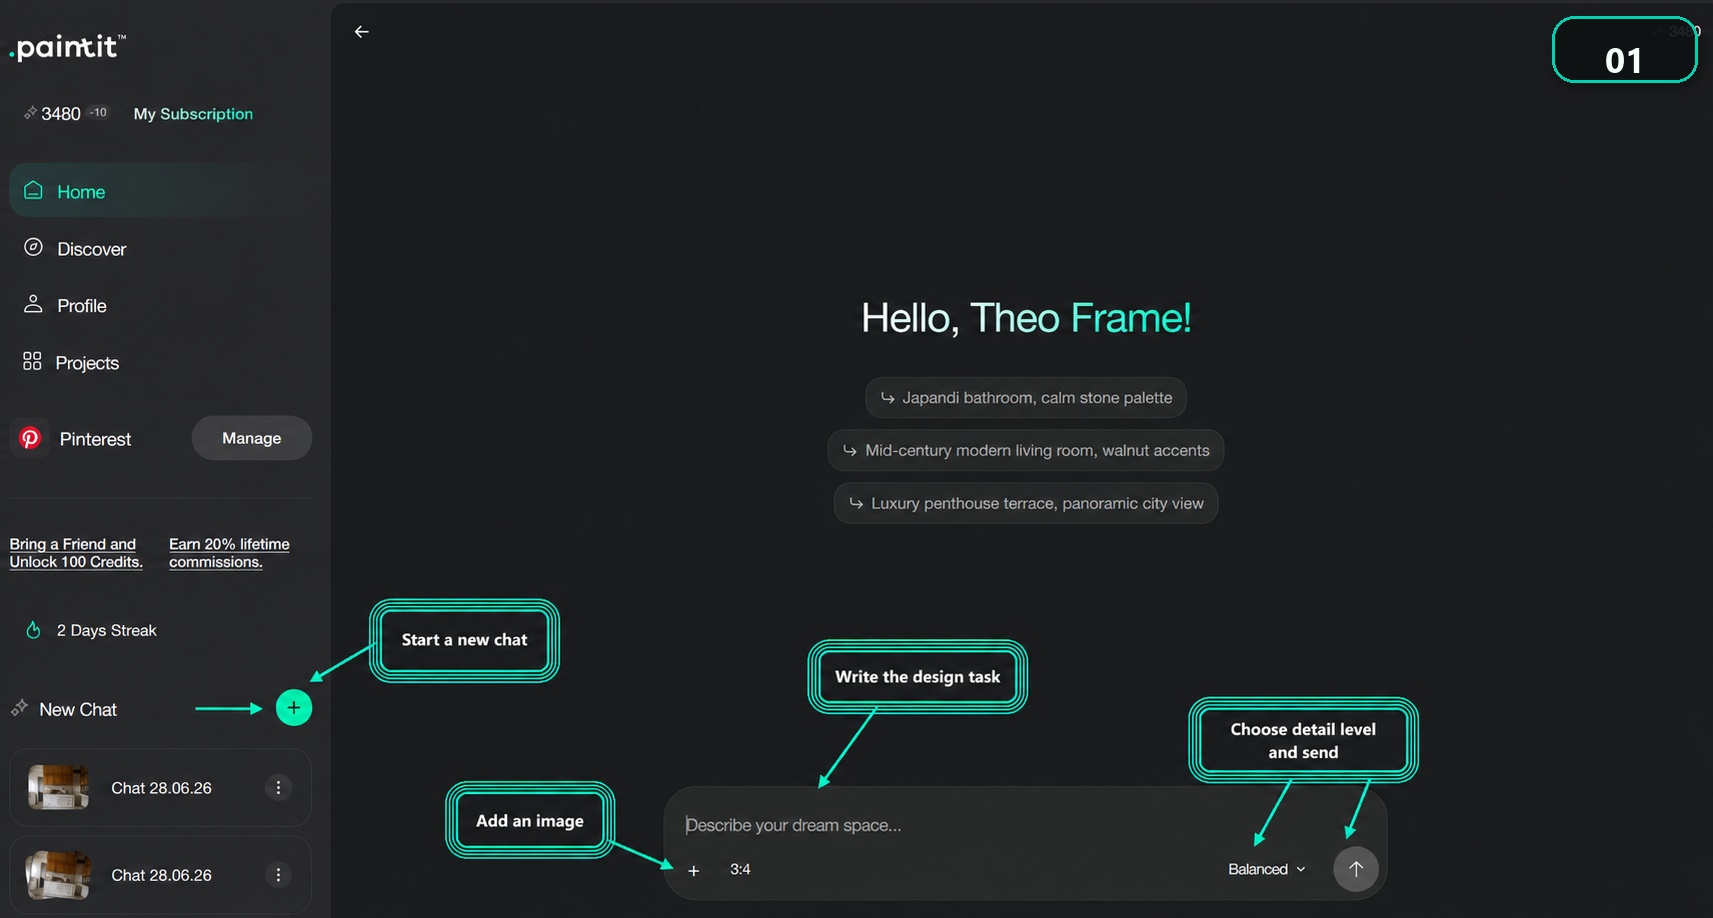
This guide shows a practical way to use Paintit.ai Chat for stronger, more believable design results.
You will learn how to:
A Paintit.ai chat remembers what happened inside that conversation: uploaded photos, generated images, reference images, previous prompts, and follow-up instructions.
That memory is useful. You can continue from a result, ask for a warmer palette, preserve the layout, replace one object, or refine a client option without starting from zero.
But chat memory also needs control.
If one thread contains a kitchen redesign, a sofa change, three different style references, a virtual staging idea, and several old prompts, Paintit.ai has more context to interpret every time you ask for the next result. At some point, the thread can become harder to guide.
Use this simple rule:
Keep one chat while the design direction is still coherent. Start a new chat when the goal changes, the style changes, or the thread starts mixing old instructions with the current task.
This matters for homeowners testing ideas, but it matters even more for professionals. Interior designers need clean option boards. Rental hosts need listing-ready direction. Contractors need material previews that do not accidentally redesign the whole room. Real estate agents need staging or cleanup that stays believable.
Cleaner chat context makes all of those workflows easier.
Not every message in Paintit.ai Chat needs to create a render.
Sometimes the best next step is a written answer: layout advice, storage ideas, color suggestions, material options, or a short plan before you spend time generating another image.
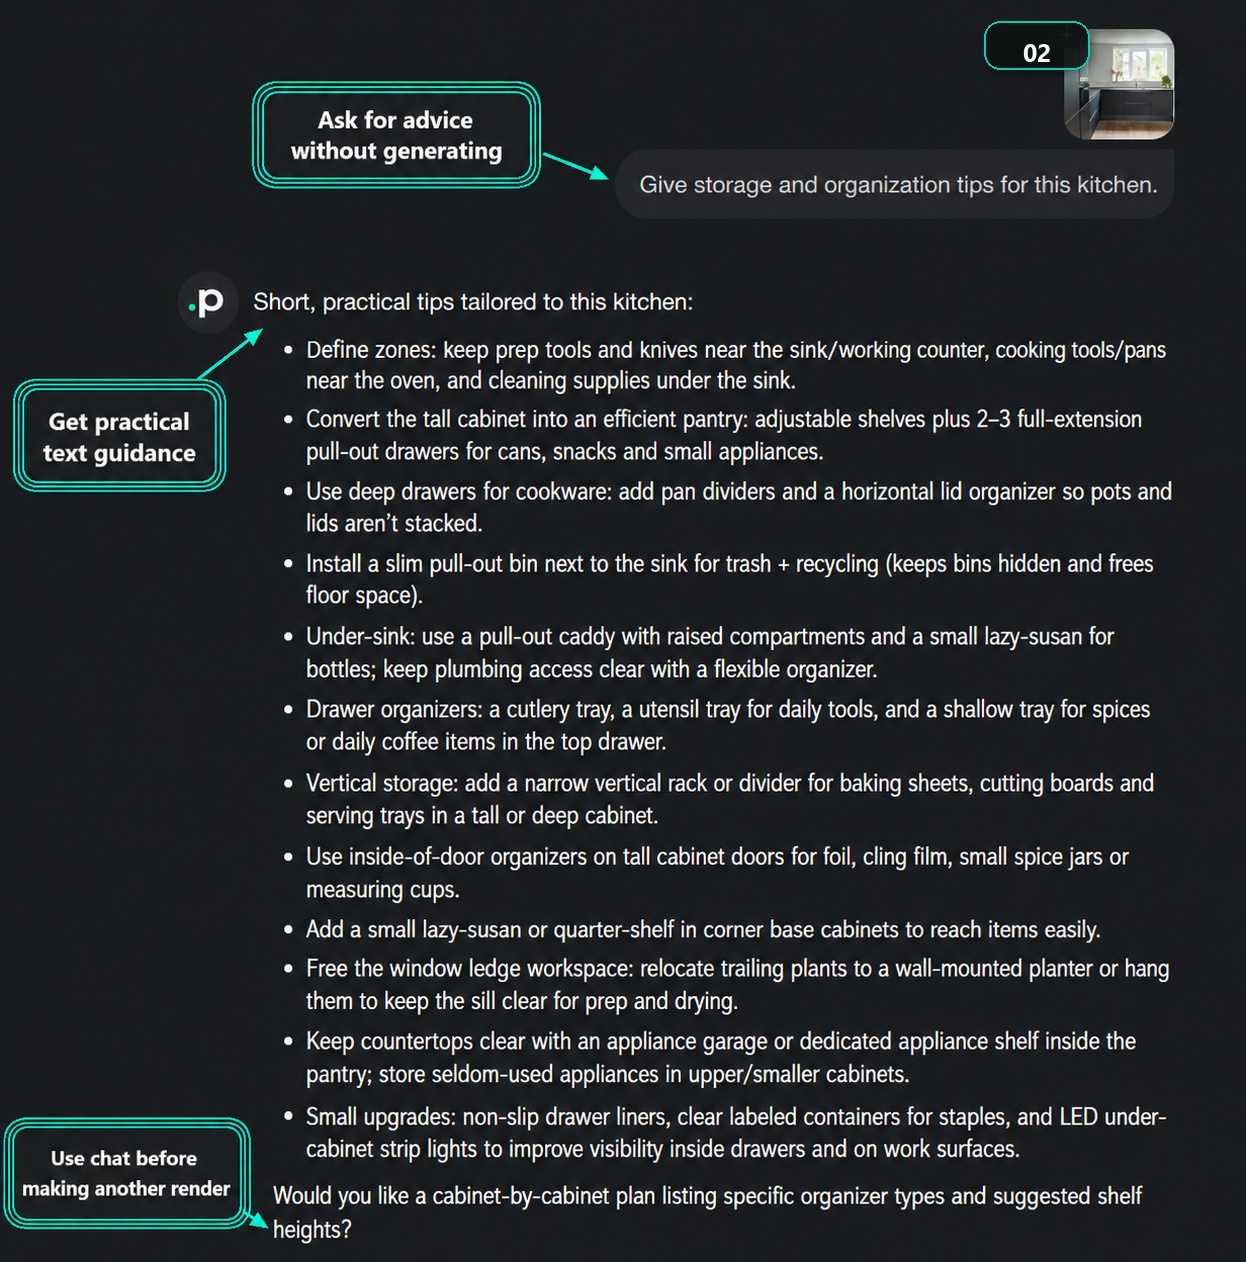
For example, instead of immediately asking for a new kitchen image, you can ask:
Give storage and organization tips for this kitchen before I generate a redesign.
Or:
Suggest three realistic directions for refreshing this rental kitchen for better listing photos. Do not generate an image yet.
Text advice is useful when you are still deciding what the image should do.
Use it for questions like:
If you want text only, say that clearly. If you want an image, say that clearly too.
A small phrase at the end can remove ambiguity:
Make image.
The main image is the room, exterior, generated result, or visual base you want Paintit.ai to work on.
If you are doing AI room design for a real kitchen, bedroom, bathroom, living room, office, rental unit, or listing photo, the main image should usually be the current space.
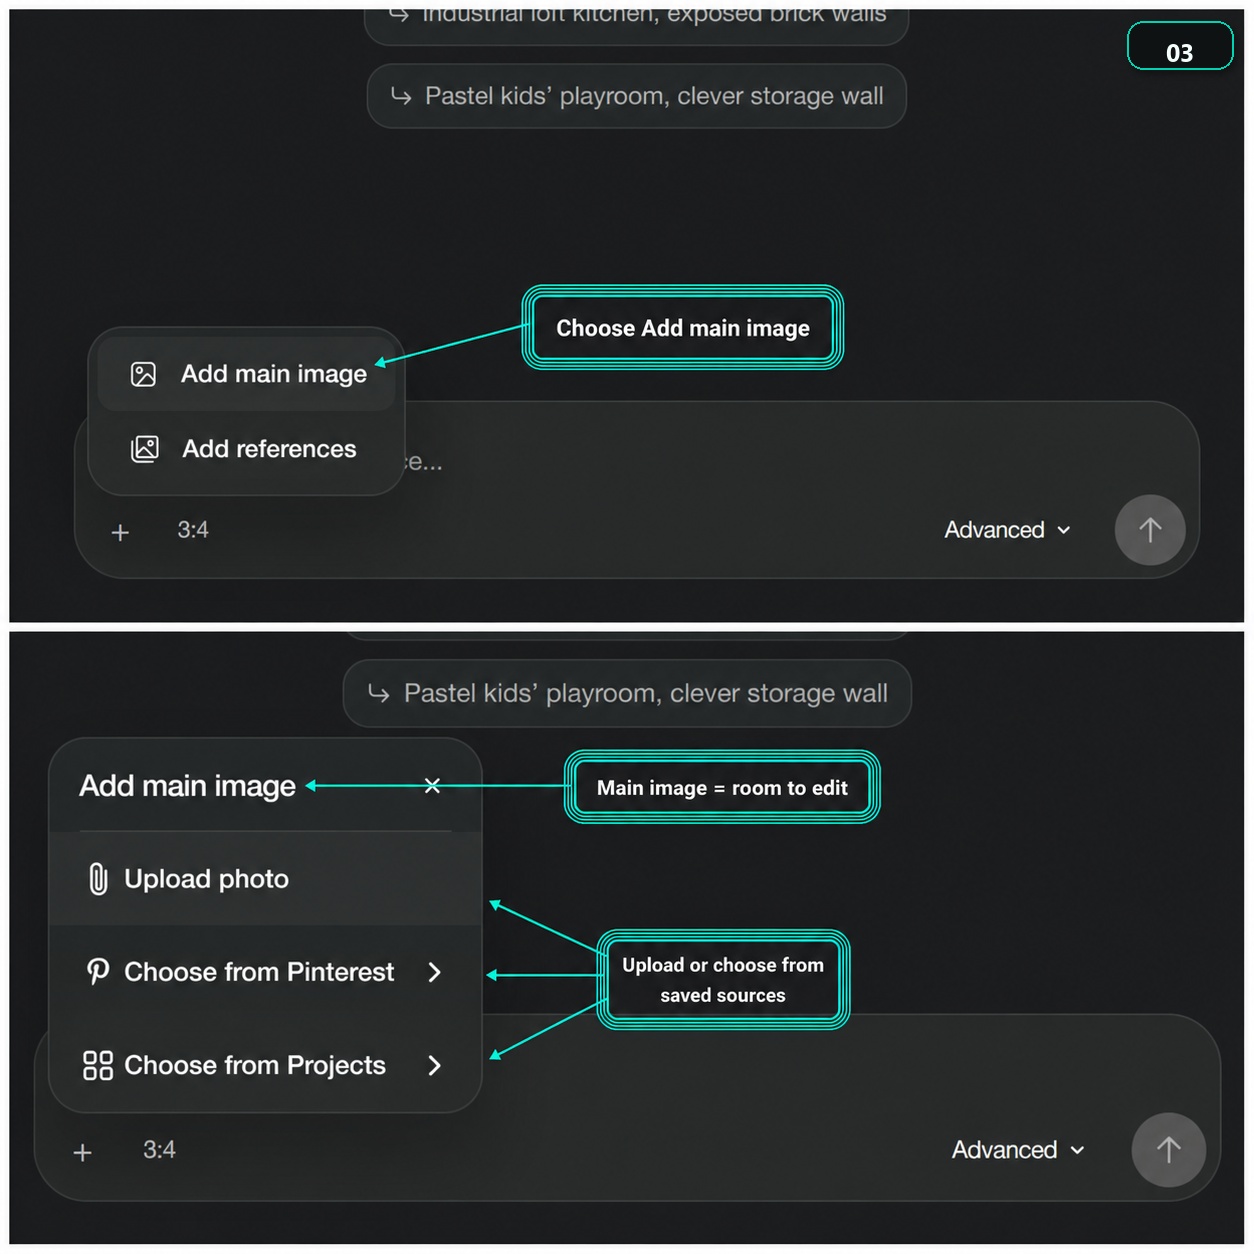
Think of the main image as the anchor.
It tells Paintit.ai:
Without a clear main image, the chat may give general inspiration or create a concept that is not grounded in the actual room.
For better results, use a source photo that is easy to understand:
If a human can quickly understand the room, Paintit.ai has a better chance too.
A reference image is different from a main image.
The main image is the space to edit. A reference image shows what to borrow.
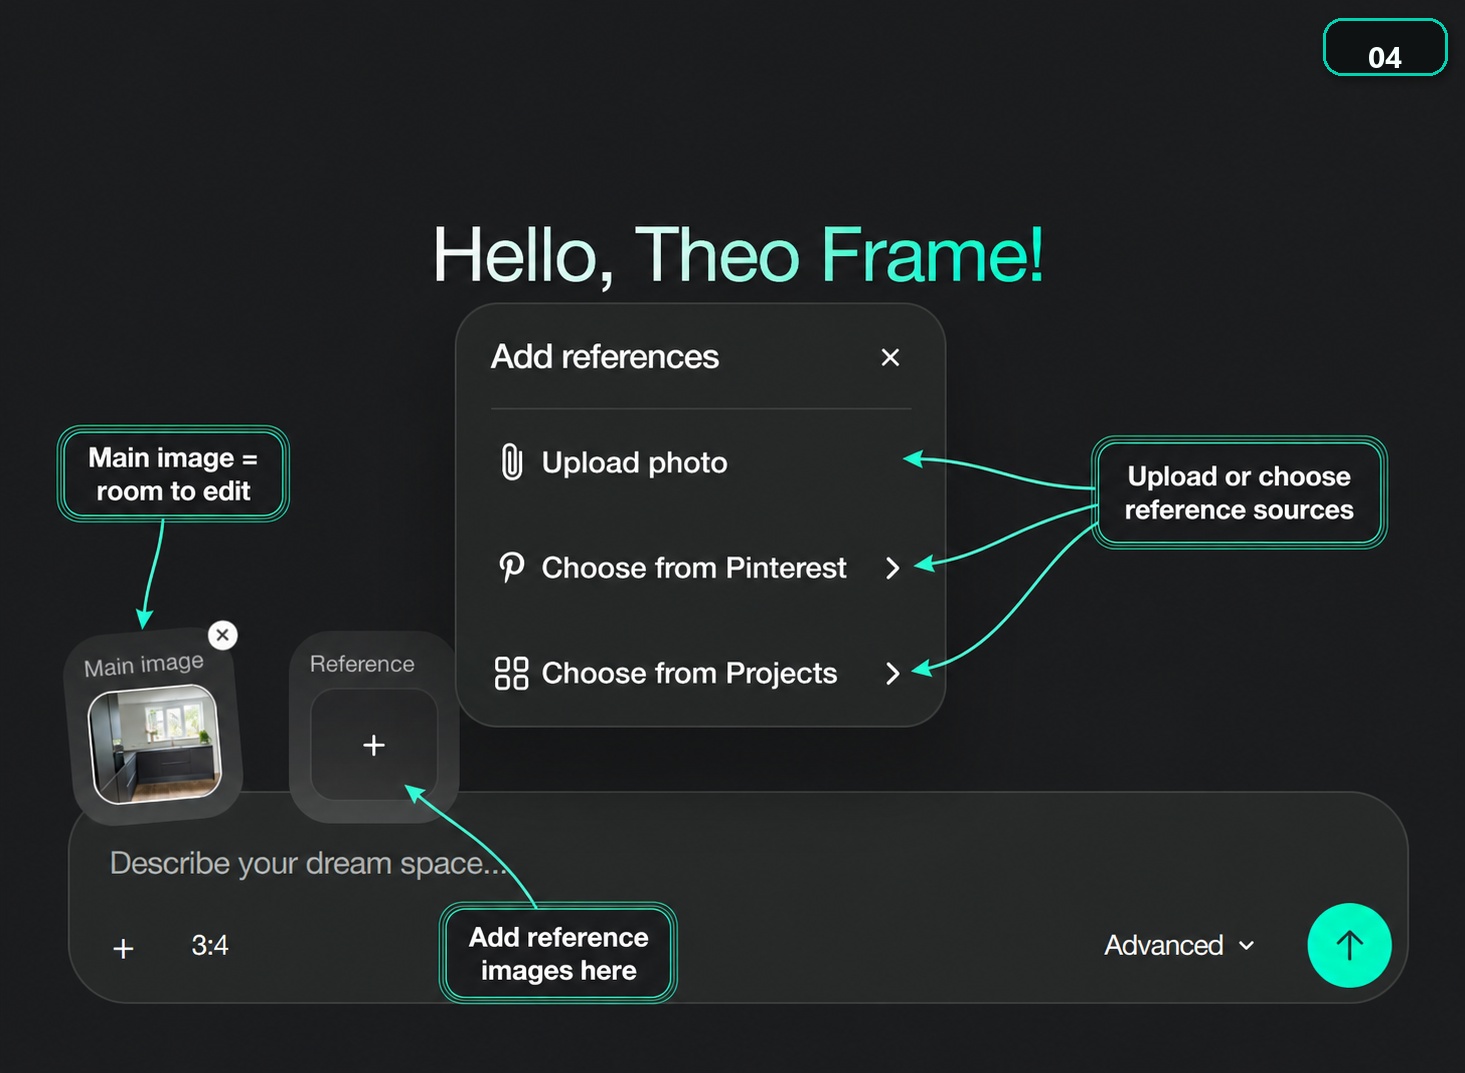
A reference can show:
The key is to explain what the reference is doing.
Do not just upload a reference and hope Paintit.ai guesses the right part.
Use this structure:
For example:
Use my kitchen photo as the main image. Use the second image as style inspiration. Keep the layout, window position, sink, and built-in oven. Apply the warmer wood tones, softer material palette, and calm natural lighting from the reference. Make image.
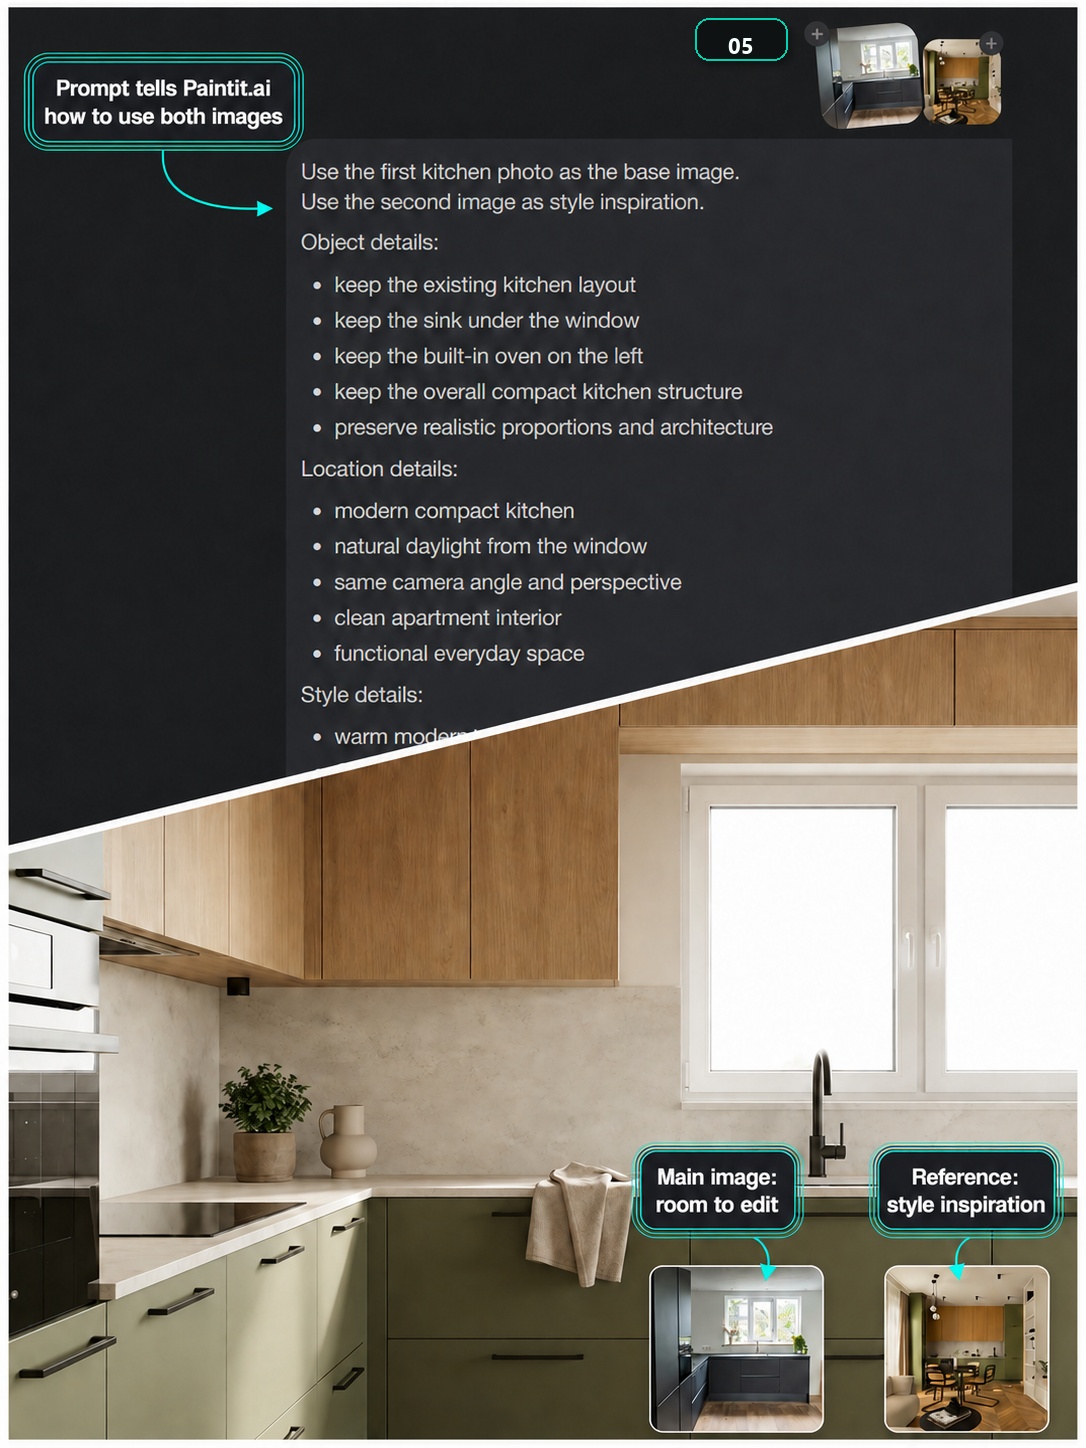
This is clearer than:
Make this kitchen like the reference.
The stronger version tells Paintit.ai what to preserve, what to change, and what visual language to borrow.
You do not always need to upload again or describe the same result from scratch.
When you like a generated image, reuse it. Add it as a new main image if you want to keep editing that version. Add it as a reference if you want it to guide a different room or option.
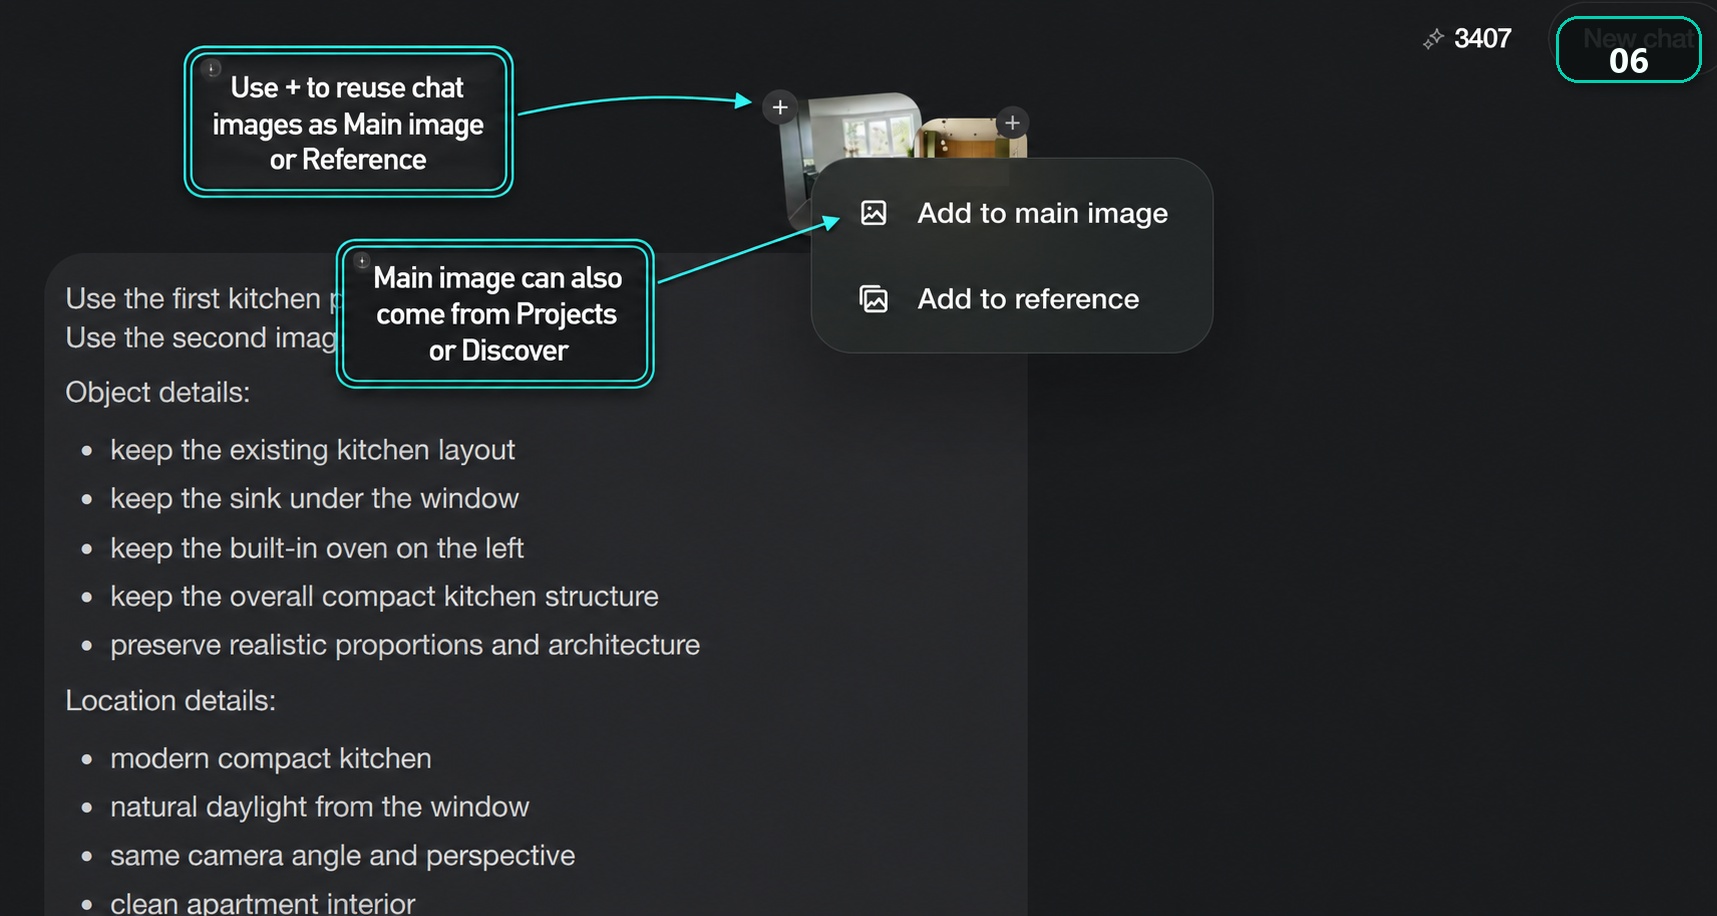
This is especially helpful when you are building:
Prompt example:
Use the latest image as the new main image. Keep the camera angle, layout, and overall design direction. Change only the upper cabinets to warm oak and make the backsplash a soft stone slab. Make image.
This keeps the workflow controlled. You continue from the result you like instead of asking Paintit.ai to rediscover it.
"Make this room look better" is understandable.
It is also too broad.
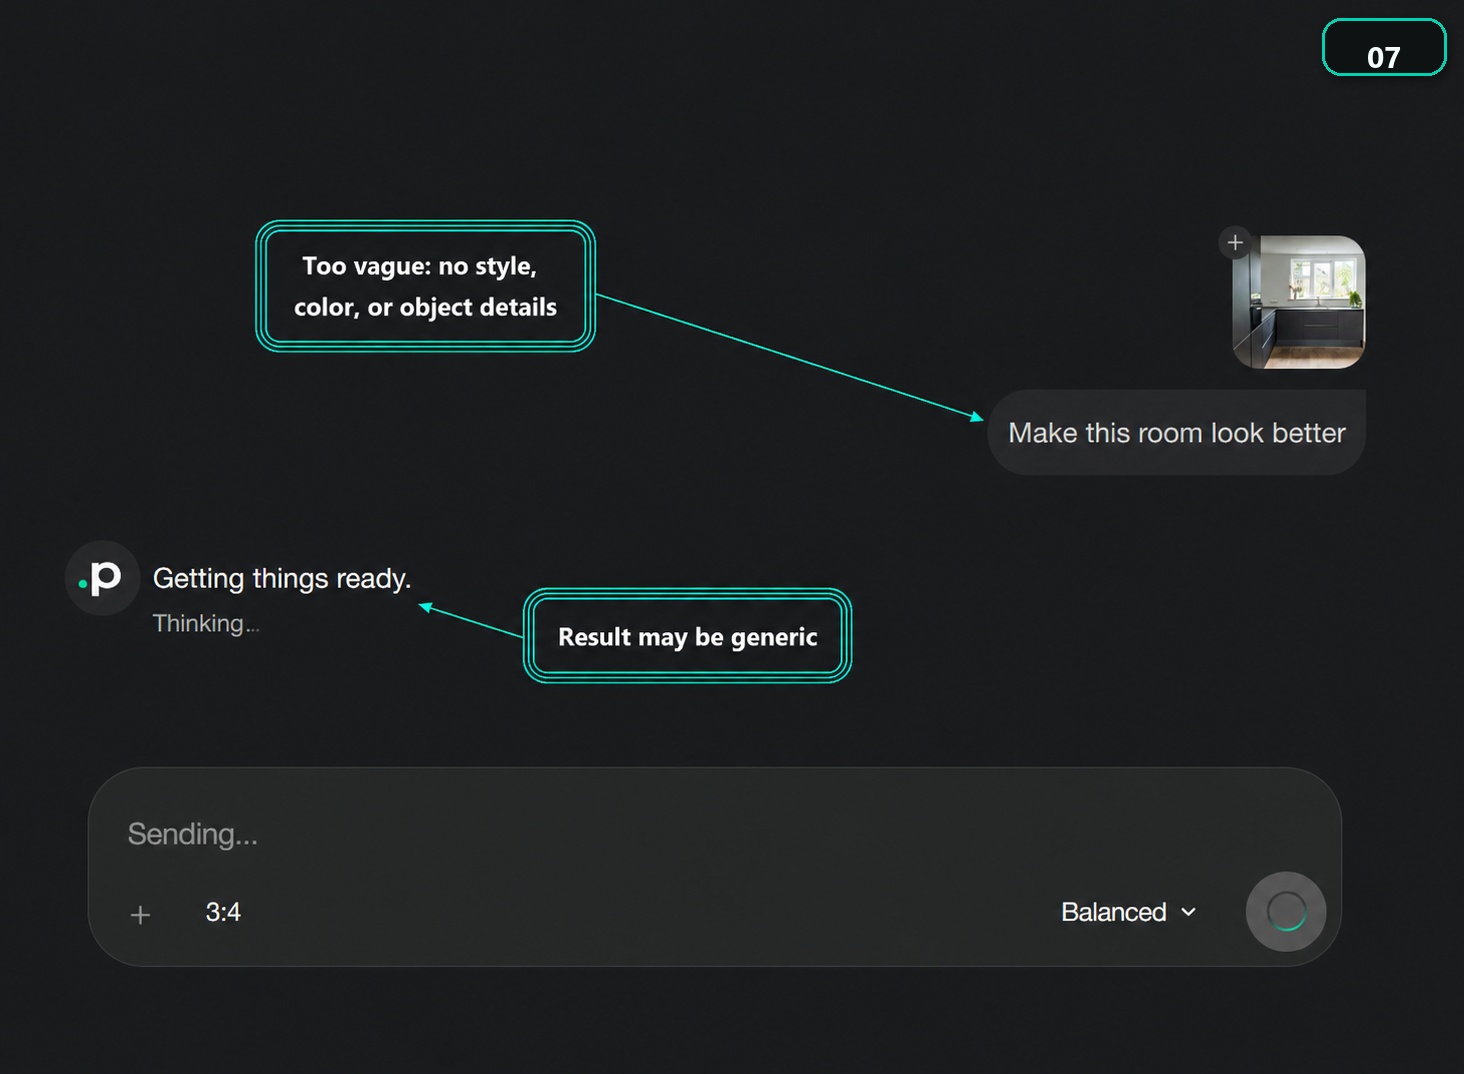
A vague prompt forces Paintit.ai to guess:
Paintit.ai can still produce something, but the result may feel generic because the instruction is generic.
A better prompt gives the chat a job.
You do not need a long prompt. You need a useful one.
A strong Paintit.ai prompt usually includes:
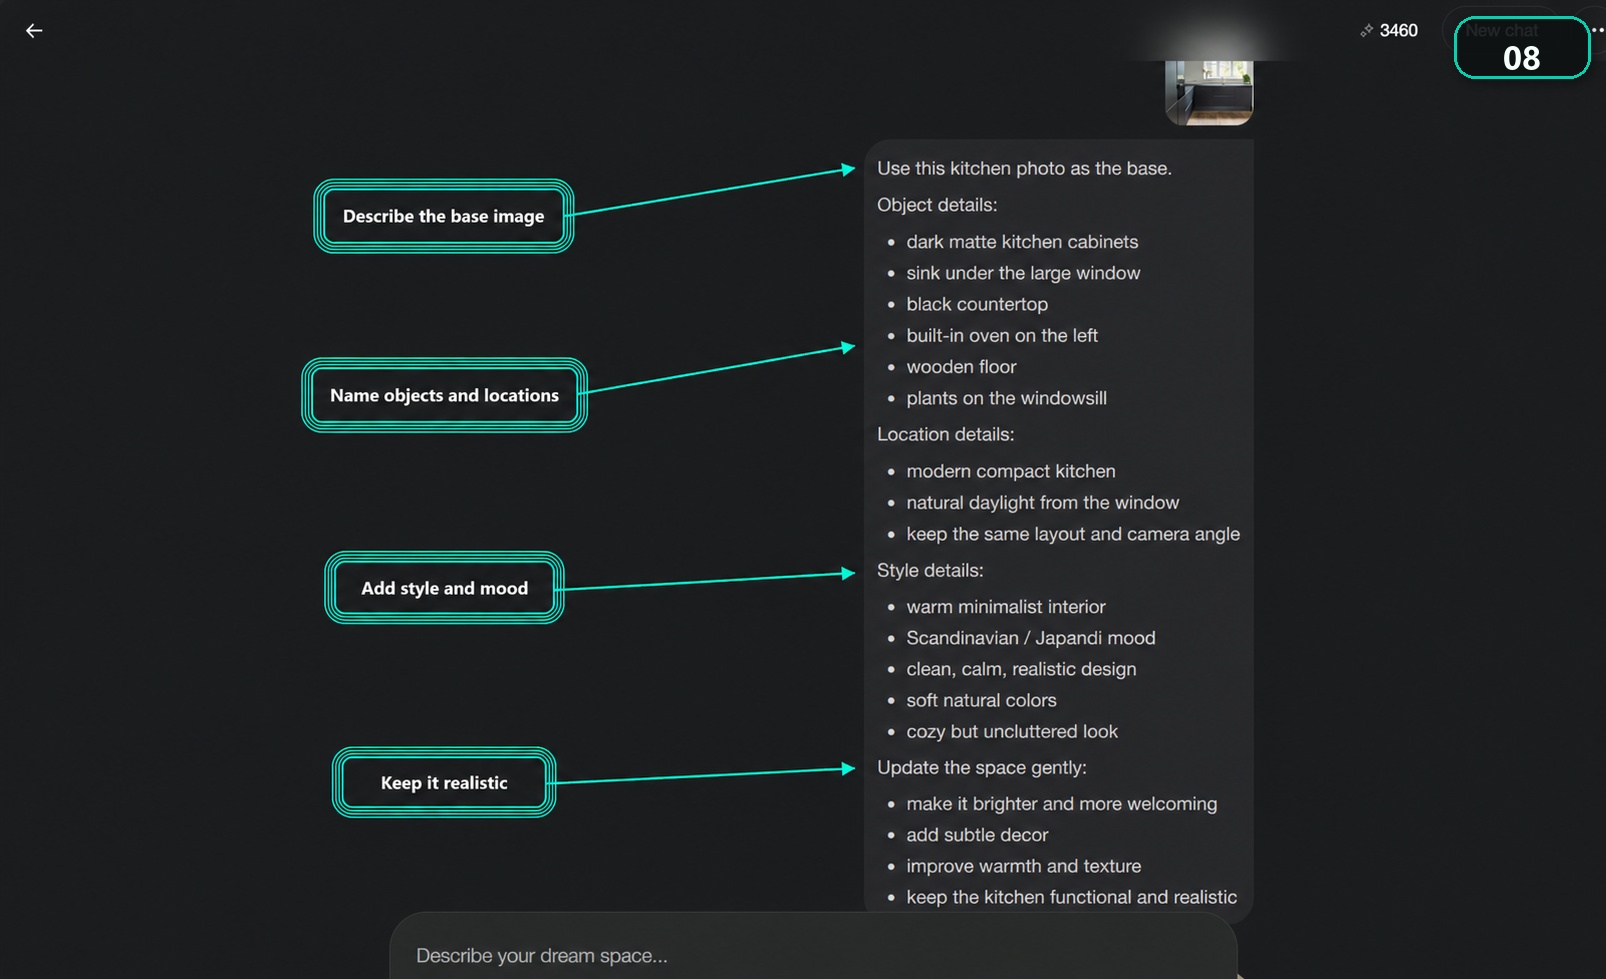
Here is a simple formula:
Use this [room/photo] as the base. Keep [fixed elements]. Change [specific elements]. Use [style/materials/colors]. Make it [mood/quality]. Preserve [constraint]. Make image.
Example for a homeowner:
Use this kitchen photo as the base. Keep the sink, window, oven position, and compact layout. Make the space brighter and warmer with oak upper cabinets, soft stone backsplash, olive lower cabinets, and simple black hardware. Keep the design realistic for a small apartment kitchen. Make image.
Example for an interior designer preparing client options:
Use this kitchen photo as the main image. Create one warm minimalist client option with natural oak, soft stone, olive lower cabinets, hidden storage, and calm daylight. Keep the layout, sink position, oven location, and window unchanged. Make image.
Example for a rental host:
Use this room photo as the base. Refresh it for stronger rental listing photos. Keep the main furniture layout, but make the space brighter, cleaner, and more welcoming. Add simple decor, soft neutral textiles, better lighting, and remove visual clutter. Make image.
Example for a contractor or renovation pro:
Use this bathroom photo as the base. Show a realistic material preview with large warm-gray floor tile, off-white wall tile, matte black fixtures, and a light oak vanity. Keep the wet-zone layout and plumbing positions unchanged. Make image.
Example for real estate virtual staging:
Use this empty living room photo as the base. Virtually stage it as a modern warm neutral living room for a property listing. Add a sofa, rug, coffee table, side lighting, and simple art. Keep the room proportions, windows, and camera angle realistic. Make image.
Example for a furniture or decor seller:
Use this room photo as the base. Place the product from the reference image naturally in the room as the main decor piece. Keep the product shape, color, and material recognizable. Make the scene look like a realistic lifestyle photo, not a catalog cutout. Make image.
The pattern is the same: define the job before asking for the image.
If one prompt asks Paintit.ai to repaint the walls, redesign the layout, change the sofa, add curtains, replace the floor, improve the lighting, remove clutter, update decor, and make everything realistic, some details may be missed.
Break the work into smaller steps.
Instead of:
Redesign this room in Scandinavian style, change the rug, replace the sofa, add oak furniture, make it brighter, change the wall color, add linen curtains, improve lighting, remove clutter, and make it realistic.
Try:
Step 1: Use this room as the base. Redesign it in a warm Scandinavian style. Keep the layout, camera angle, window positions, and main furniture locations. Make image.
Then continue:
Use the latest image. Keep the design direction. Replace only the sofa with a low-profile beige linen sofa. Make image.
Then:
Use the latest image. Keep everything else the same. Add soft linen curtains and warmer evening lighting. Make image.
Smaller steps are better for real room redesign because layout, windows, furniture, materials, and lighting all matter at the same time.
Paintit.ai gives you different detail levels for different parts of the workflow.
Use them on purpose.
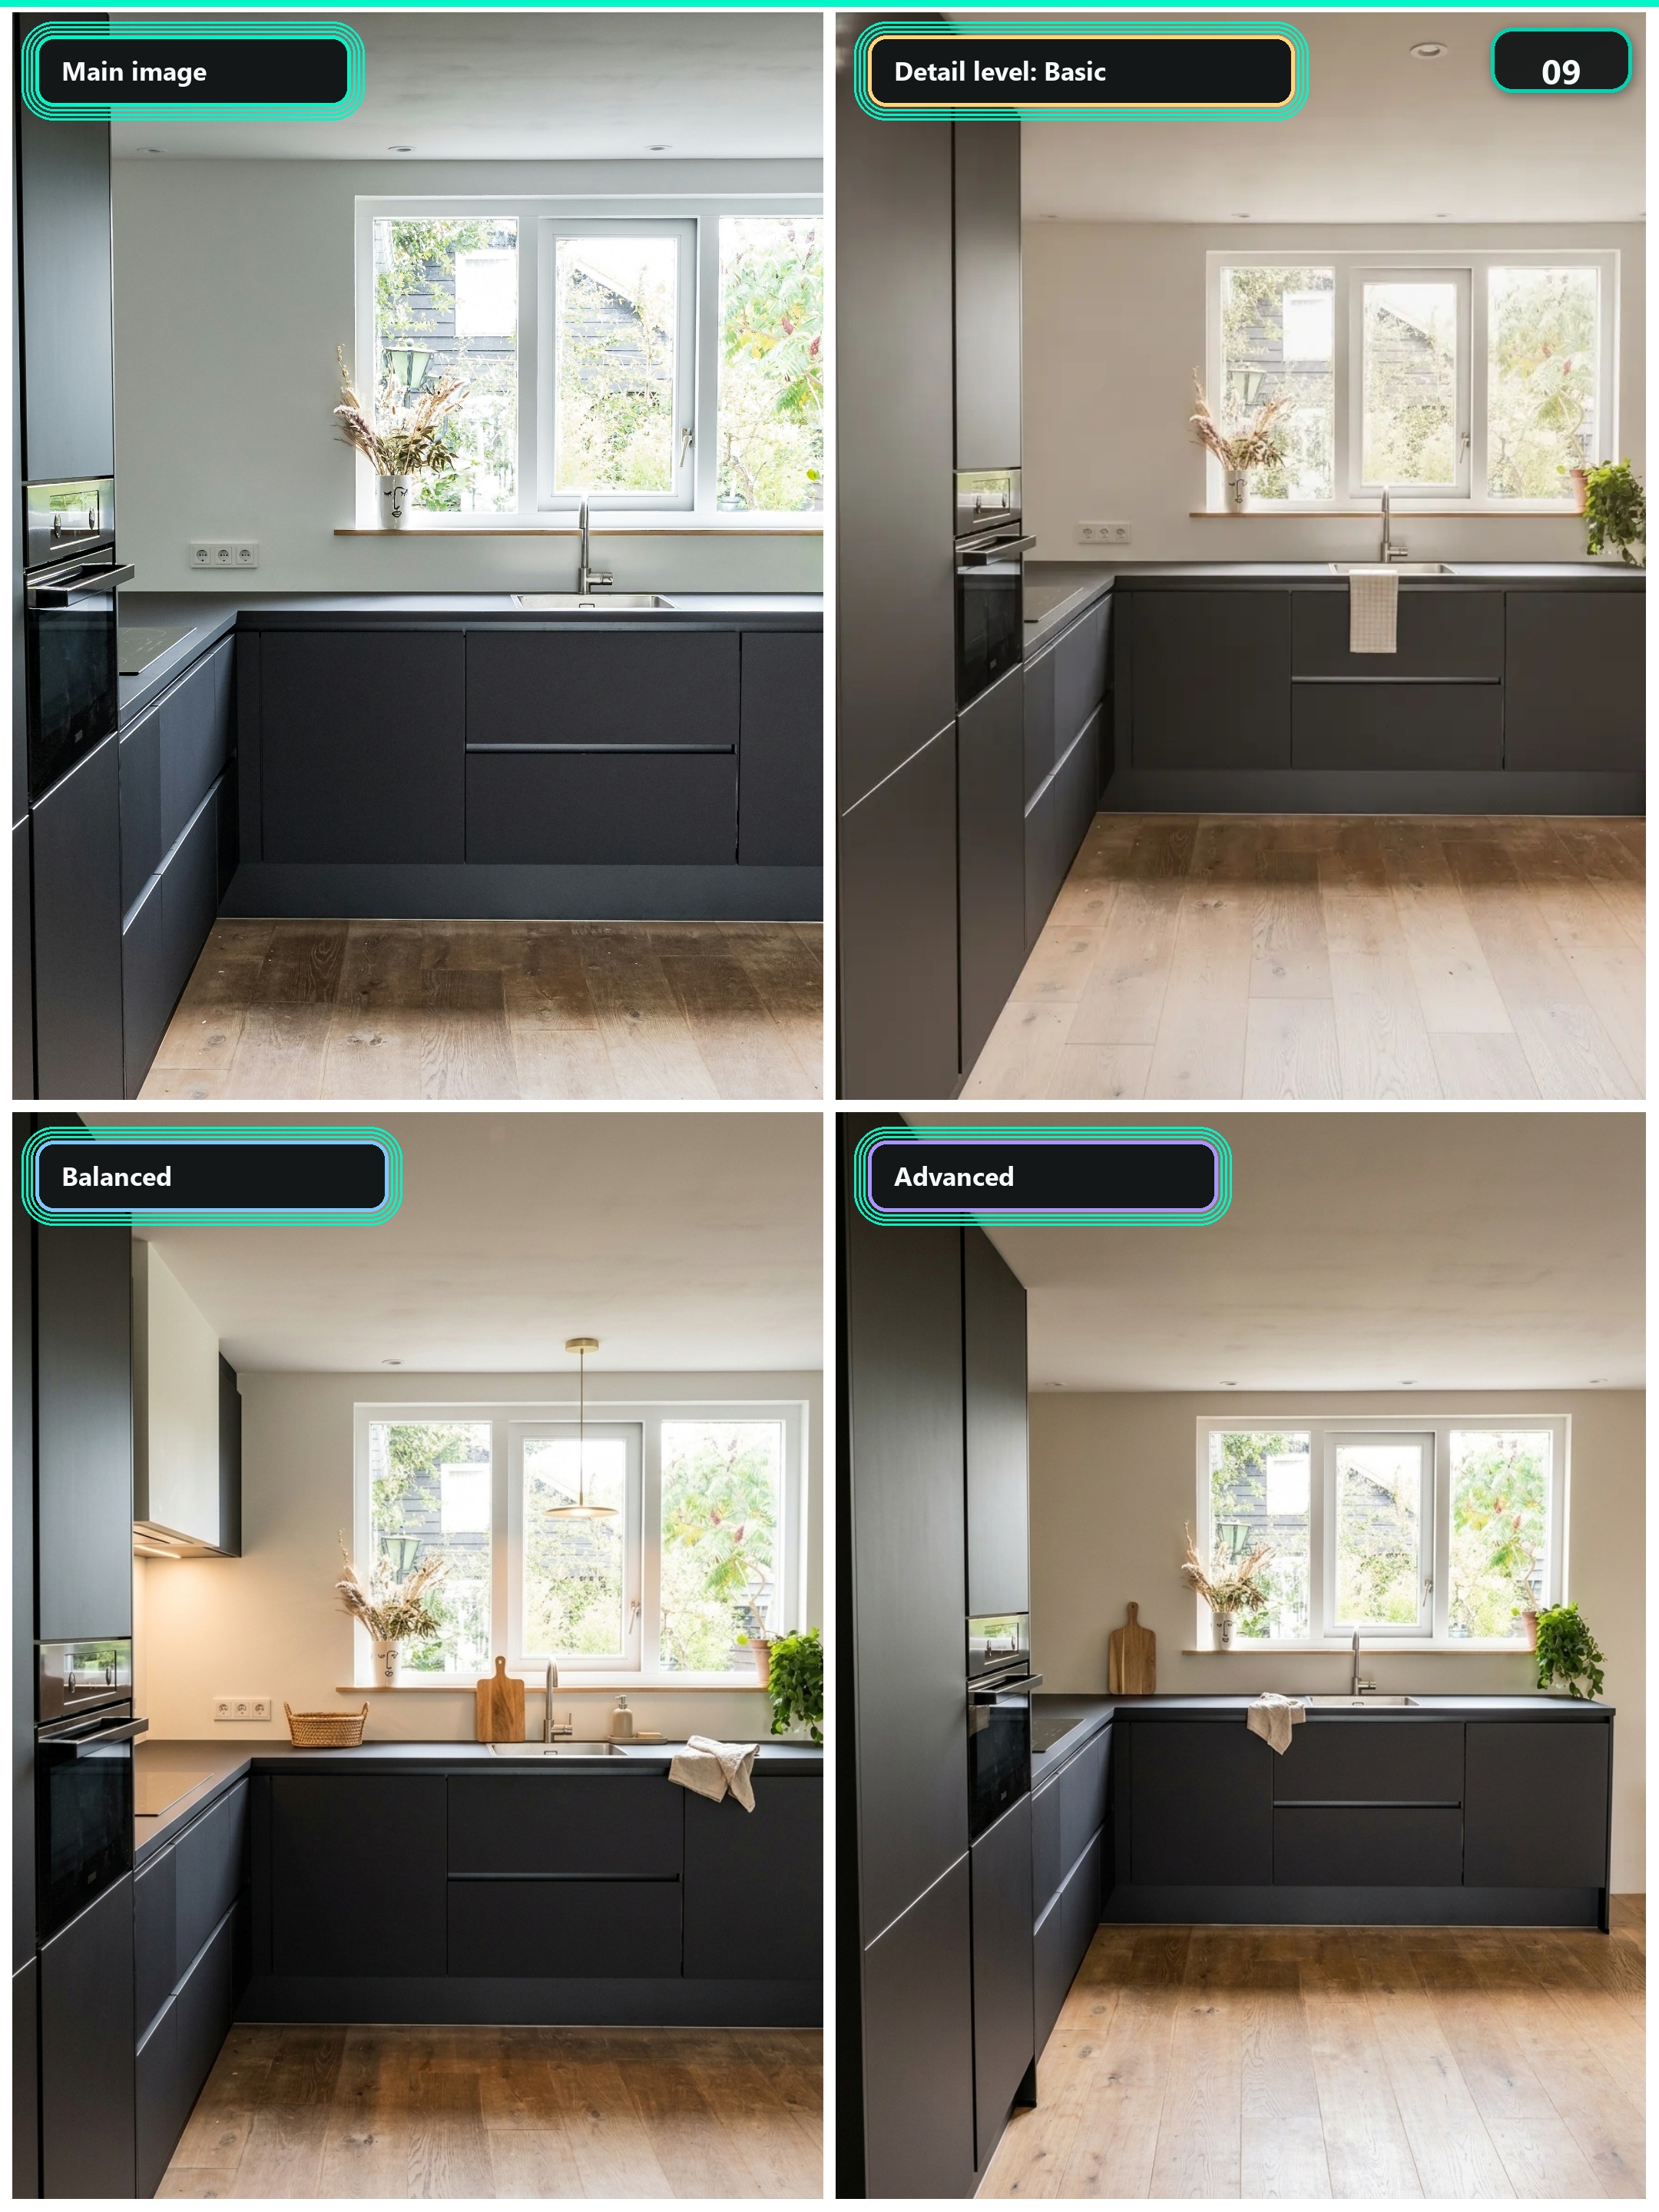
A practical way to think about detail levels:
Do not expect every detail level to behave exactly the same. Higher detail levels may interpret the design task more deeply, but that does not mean you should use them for every rough idea.
Test early. Refine later.
For client work, rental listing updates, real estate staging, or material previews, this can save time:
Long chats can be useful until they are not.
If a thread contains several room photos, generated results, references, corrections, style changes, and old prompt experiments, Paintit.ai has more information to consider with every new request.
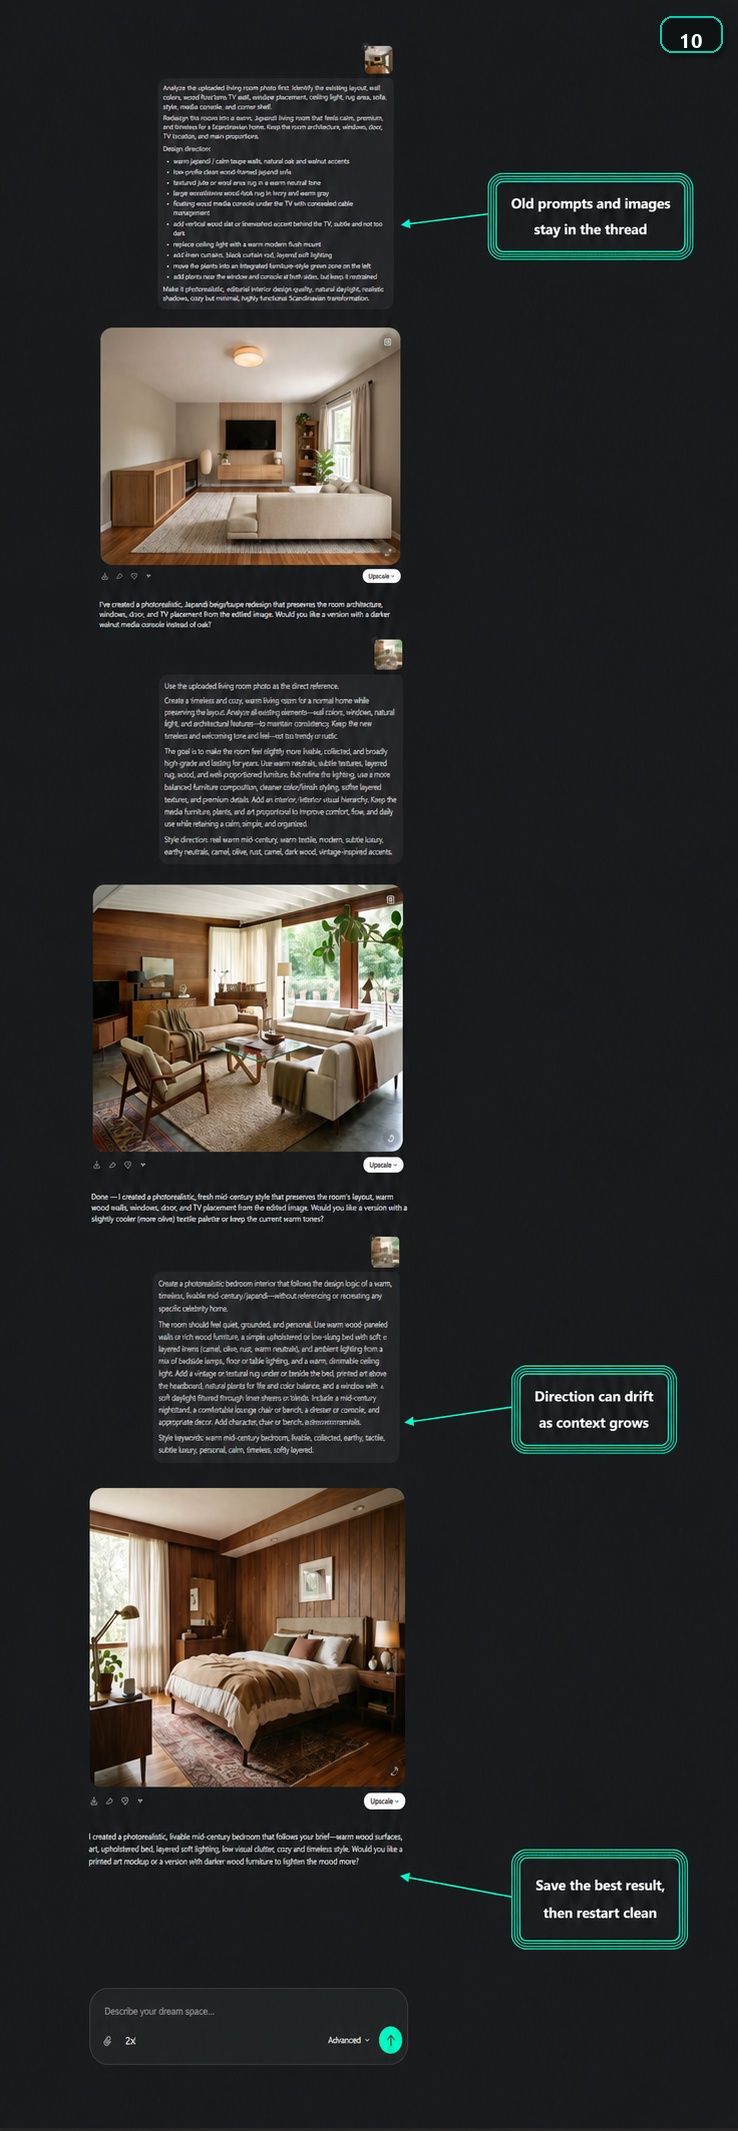
Signs that a chat is getting too noisy:
When that happens, do not fight the whole thread.
Use a clean restart:
For example:
Use this image as the new starting point. Keep the current design direction and camera angle. Replace only the sofa with a low-profile beige linen sofa. Make image.
This gives Paintit.ai a cleaner working context.
Early generations are for decisions.
Final upscales are for images you actually want to keep.
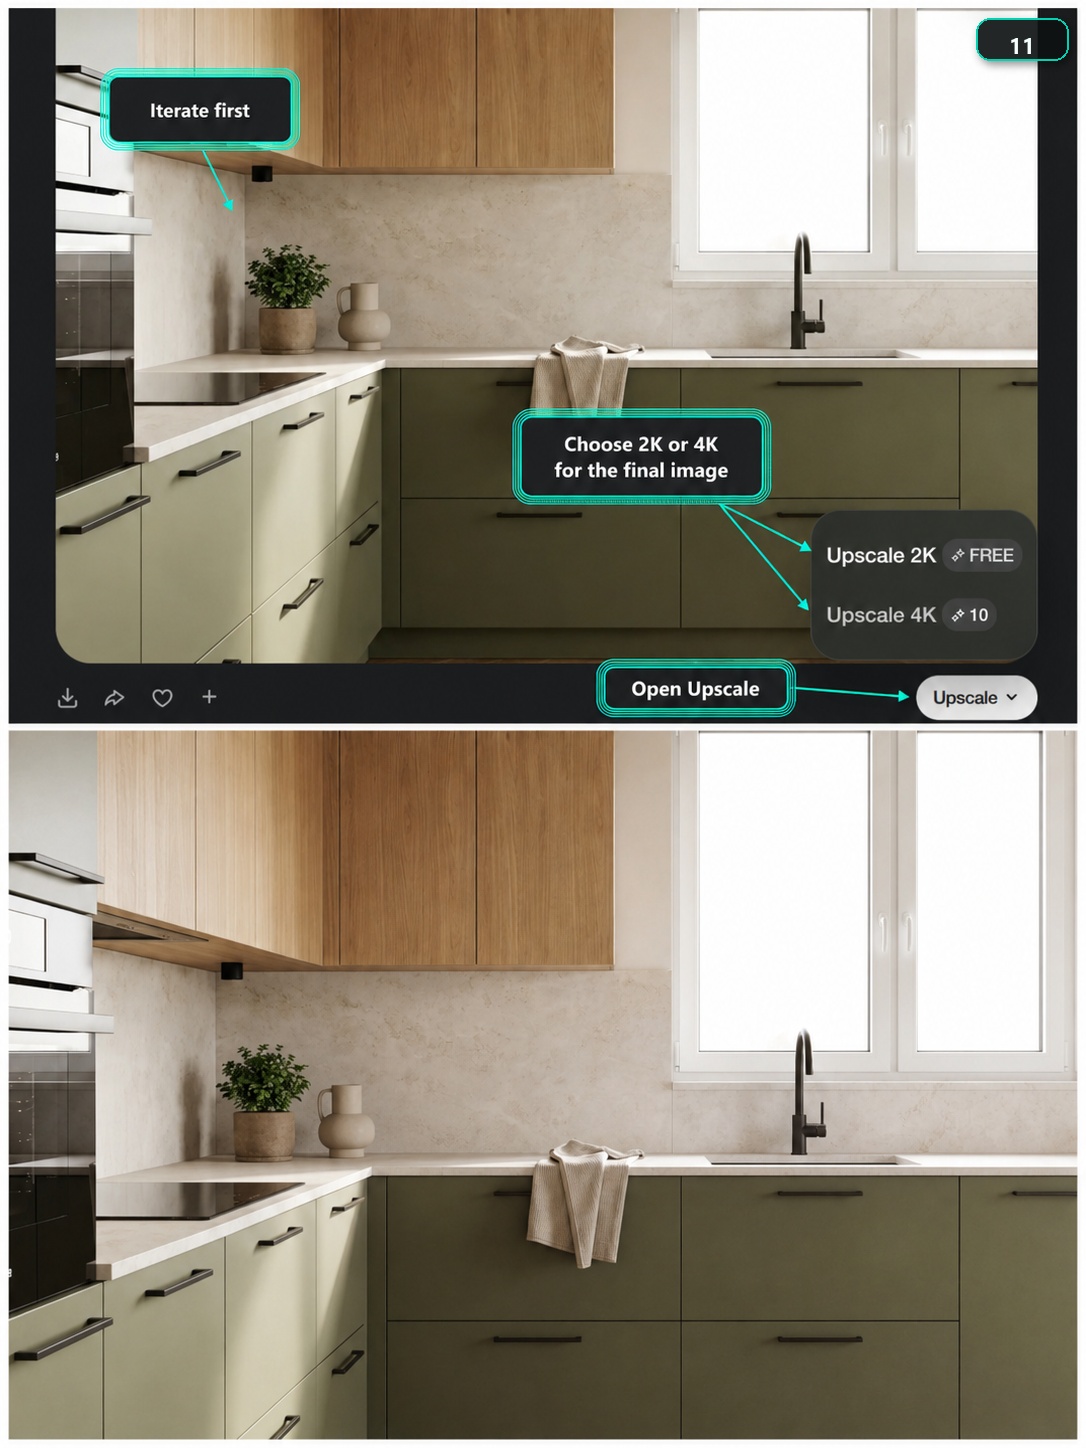
Do not upscale every rough idea.
First, check the design direction:
Once the answer is yes, use the available upscale options for the final image.
This is especially important if you are preparing client visuals, listing images, product lifestyle scenes, or polished before/after content. Upscaling is most valuable after the direction has already earned it.
Use this workflow when you want stronger and more consistent Paintit.ai results:
That is the difference between using AI as a random generator and using it as a guided AI interior designer.
Avoid these common Paintit.ai mistakes:
The biggest improvement usually does not come from making prompts longer. It comes from making the workflow clearer.
Use a clear main image, write a focused prompt, say what should stay unchanged, and avoid mixing too many changes in one request.
If you want Paintit.ai to edit a real room, start with the room photo as the main image. Then use the prompt to explain the change.
Use reference images when you want to guide style, mood, materials, furniture, paint colors, or product placement. Always explain what Paintit.ai should borrow from each reference.
Usually because the prompt is too vague, the photo is hard to read, the reference image is not explained, or the chat is trying to combine too many old directions.
No. But clearer decisions produce stronger results. You do not need professional language. You just need to say what the room is, what you want to change, what should stay, and what style or mood you prefer.
Use it for fast option building: client alternatives, listing refreshes, material previews, virtual staging, product lifestyle scenes, and before/after concepts. Keep each chat focused on one direction so the output stays easier to evaluate.
Upscale after you have chosen a result worth keeping. Explore first, refine second, upscale last.
Paintit.ai will not read your mind. But it can work with a clear room photo, useful references, and a prompt that explains the design decision.
Start with one room, one goal, and one clean instruction.
Then refine from there.