10 min. reading
How to Use AI to Design a Room: The Ultimate Workflow for 2026
Yulii Cherevko
CEO paintit.ai

Page Contents:
- 1. What is AI room design?
- 2. How AI helps you design a room
- 3. The Pro Mindset: Turning Ideas into AI-Ready Directions
- 4. A Repeatable 4-Stage Workflow (Tool-Agnostic → Applied to Paintit.ai)
- 5. The AI Room-Design Tool Landscape (Where Paintit.ai Shines)
- 6. Getting Started with Paintit.ai: Interface & Philosophy
- 7. Real-Life Scenarios (Hands-On, Step-by-Step)
- 8. Professional Polish: Spotting and Fixing AI Mistakes
- 9. Hybrid Pipelines & Portfolio Presentation
- 10. Prompt Templates (Copy-Paste)
- 11. Benefits of using AI for room design
- 12. Conclusion: Be the Creative Director of Your Space
- 13. FAQ
Key Takeaways
- The Role Shift: AI turns you from a "drafter" into a "Creative Director." You control the vision; AI handles the rendering.
- The Formula: A perfect prompt = Room Type + Style + Design Principles + Constraints.
- Best Tool for Speed: Paintit.ai excels at rapid ideation and "image-to-image" restyling.
- The Workflow: Don't expect perfection in one click. Use the loop: Generate → Curate → Refine → Generate.
- Pro Tip: Use design principles like Balance, Rhythm, and Emphasis in your prompts to get professional results.
Designing a room with AI is no longer a novelty-it's a practical, repeatable workflow that can save hours and unlock better ideas, faster. In this guide, we'll show you how professionals turn vague ideas into precise, directive prompts, how to build a dependable 4-stage workflow, and how to get hands-on with Paintit.ai for real-world scenarios like full redesigns, virtual staging, and targeted edits.
As a team behind Paintit.ai, we'll walk you through the essentials so you can work like a creative director, not a passive operator. Our promise: by the end of this guide you'll know exactly how to use AI to design a room-from first prompt to polished concept.
What is AI room design?
AI room design is the process of using artificial intelligence to ideate, restyle, and visualize interiors from simple inputs-typically a photo of your space, a quick sketch, or a snapshot from a 3D model. Instead of drafting everything manually, you describe the goal (style, mood, materials, constraints) and the AI generates photoreal concepts you can curate and refine.
At its best, AI room design turns you from a passive operator into a creative director. You provide directive prompts anchored in core design principles (balance, harmony, rhythm, emphasis, contrast, scale/proportion, detail) and elements (space, line, form, light, color, texture, pattern). The AI then proposes multiple variations, so you can explore "what if?" options in minutes and iterate toward a clear vision.
Common starting points include:
-
Working with an existing room photo to try new styles or layouts.
-
Virtual staging of an empty space to test furnishing scenarios.
-
Converting a simple sketch into a photoreal concept (Sketch-to-Design).
AI room design is ideal for rapid ideation and visual alignment with stakeholders. For precise measurements, codes, and technical drawings, it pairs well with dedicated 2D/3D planning tools. In short: use AI to accelerate concept exploration, then translate the winning direction into a detailed plan when you're ready to build.
How AI helps you design a room
AI accelerates concept exploration and translates your intent into clear visual options you can curate like a creative director.
-
Turn inputs into visuals: Start from a room photo, an empty shell, or a simple sketch-AI generates photoreal concepts you can compare side by side.
-
Work in iterations: Generate → curate → refine → regenerate. Keep wins (layout, palette) and change one variable at a time (sofa, lighting, focal point).
-
Prompt with principles: Bake in balance, harmony, rhythm, emphasis, contrast, scale/proportion, and detail so the output follows professional design logic.
-
Control style quickly: Swap aesthetics ("Scandinavian cozy", "industrial loft", "warm minimal") without rebuilding from scratch.
-
Targeted edits: Repaint walls, replace a single item, add/remove objects-precise, surgical changes without redoing the whole scene.
-
Bridge to planning: Use AI for ideation, then move the selected concept into 2D/3D planning tools for dimensions and documentation.
-
Portfolio storytelling: Save prompts and iterations to show your process-from "before" to polished concept-with clear creative decisions.
The Pro Mindset: Turning Ideas into AI-Ready Directions
AI doesn't "understand pretty." It understands structure. The fastest way to professional results is translating your design intent into the language of principles and elements-so your prompts become clear directives, not wish lists.
Principles to bake into prompts
Think of these as the rules that shape the whole:
-
Balance (symmetric, asymmetric, radial): Specify which you want.
Example: "Asymmetric balance-large sectional on the left balanced by a tall plant and gallery wall on the right." -
Harmony & unity: Keep a coherent palette and material story across the scene.
Example: "Mid-century modern palette: walnut, olive green, matte brass-consistent across furniture and lighting." -
Rhythm (repetition, progression, transition): Lead the eye through subtle repetition.
Example: "Repeat geometric pattern on rug, cushions, and one abstract art piece." -
Emphasis (focal point): Declare your primary focus and keep other elements quieter.
Example: "Focal point: overscale crystal chandelier centered over rustic oak table; supporting elements remain subdued." -
Contrast: Create depth with opposing elements.
Example: "High contrast: plaster-white wall with black-oak floor; plush velvet sofa against a crisp metal coffee table." -
Scale & proportion: Guardrails against AI's common sizing mistakes.
Example: "High ceilings with a correctly scaled large sectional; realistic furniture dimensions suitable for human use." -
Detail: Finishing touches that signal craft.
Example: "Matte-black cabinet hardware, visible leather seams, elegant crown molding."
Elements to specify in prompts
These are the building blocks AI composes:
-
Space: "Generous negative space for a light, minimal feel."
-
Line: "Vertical bookshelf lines to visually lift the ceiling."
-
Form: "Geometric furniture forms paired with organic plant silhouettes."
-
Light: "Soft, diffused morning light through sheer linen curtains."
-
Color: "Warm, earthy palette with terracotta and mustard accents."
-
Texture: "Mix smooth leather, coarse linen, polished metal."
-
Pattern: "Restrained pinstripe wallpaper with subtle floral upholstery."
Prompt pattern you can copy
Room type + style + principle + elements + constraints

Example:
"Redesign this bedroom in a cozy Scandinavian style.
Neutral palette with white and light gray; natural materials
(light oak bed frame/flooring) and soft textures (chunky knit throw).
Maintain functional, balanced layout; soft, diffused lighting.
Use realistic scale and keep existing architectural features." |
Use this mindset and you'll immediately write clearer, more "design-literate" prompts-exactly what AI needs.
A Repeatable 4-Stage Workflow (Tool-Agnostic → Applied to Paintit.ai)
The pro process isn't linear; it loops. Think: Generate → Curate → Refine → Generate. Speed comes from iteration, not one-shot perfection.
Input preparation: photo, sketch, or 3D snapshot
Quality in equals quality out.
-
Photo of the real room: Shoot in good, even light; wide enough to read layout; remove clutter so AI reads structure and lighting conditions accurately.
-
Sketch: Keep lines clean and spaces clearly labeled so the model reads walls, doors, and windows.
-
3D snapshot (e.g., from another app): Hide extra guide lines and keep primary volumes clear.
Ideation & generation
-
Start prompt: Combine the principles above with concrete details (style, materials, atmosphere, constraints).
-
Generate variations: Early on, prioritize range over polish-cast a wide net to map the concept space.
-
Creative level: Choose how far AI may deviate from the input (similar, balanced, creative).
Curation & iteration
-
Evaluate: Use the principles checklist-does the concept hold together? Is scale plausible? Is the focal point clear?
-
Iterate in conversation: Don't restart; compound your wins.
Example: "Keep layout; change sofa to green velvet Chesterfield; moodier evening lighting (rainy ambiance)."
Post-production & integration
-
Micro-fixes: Minor cleanups (removing artifacts, tightening materials).
-
Hybrid workflows: Use AI for rapid ideation, then translate the winning concept into a planning tool for technical drawings, or refine materials in an editor.
The AI Room-Design Tool Landscape (Where Paintit.ai Shines)
Not all AI tools serve the same job. The smartest approach is choosing based on task and desired control.
Main categories
-
Generative ideation & image-to-image: Fast style transformations from a photo or sketch-great for mood, options, and visual inspiration. (Paintit.ai lives here.)
-
Comprehensive 2D/3D planning: CAD-like floor plans, furniture libraries, and renders-more control, more learning curve.
-
Text-to-image artistry: Powerful concept art from text prompts-superb for moodboards; less aware of your real room's constraints.
For a broader directory of AI tools, see The AI Navigator .
Quick comparison
| Feature / Best for | Paintit.ai | Planner 5D | Homestyler | Midjourney |
|---|---|---|---|---|
| Core function | Quick restyling & virtual furnishing (image-to-image) | 2D/3D floor-plan creation & detailed design | 2D/3D planning with rendering | Artistic image generation from text |
| Best use cases | Rapid visualizations, style exploration, homeowners, real-estate | Accurate, detailed plans built from scratch | Friendly templates and real-time viz for newcomers | High-art moodboards, unique stylistic studies |
| Input | Photo, sketch, text | Floor plan builder; photo import for AI planning | Drag-and-drop, templates | Text prompts; optional image prompts |
| Strengths | Intuitive, fast, "choose a style like a track" | High control, large furniture library, 2D/3D integration | Ease of use, real-time visualization | Unmatched artistic quality/detail |
| Limitations | Less granular control over exact dimensions/layout | Higher learning curve; potentially time-intensive | Generally less powerful than pro CAD | Not spatially aware of your actual room |
Use the comparison to set expectations: reach for Paintit.ai when you want speed, image-to-image restyling, and agile concept testing; pivot to a planner when you need millimeter-grade technical drawings.
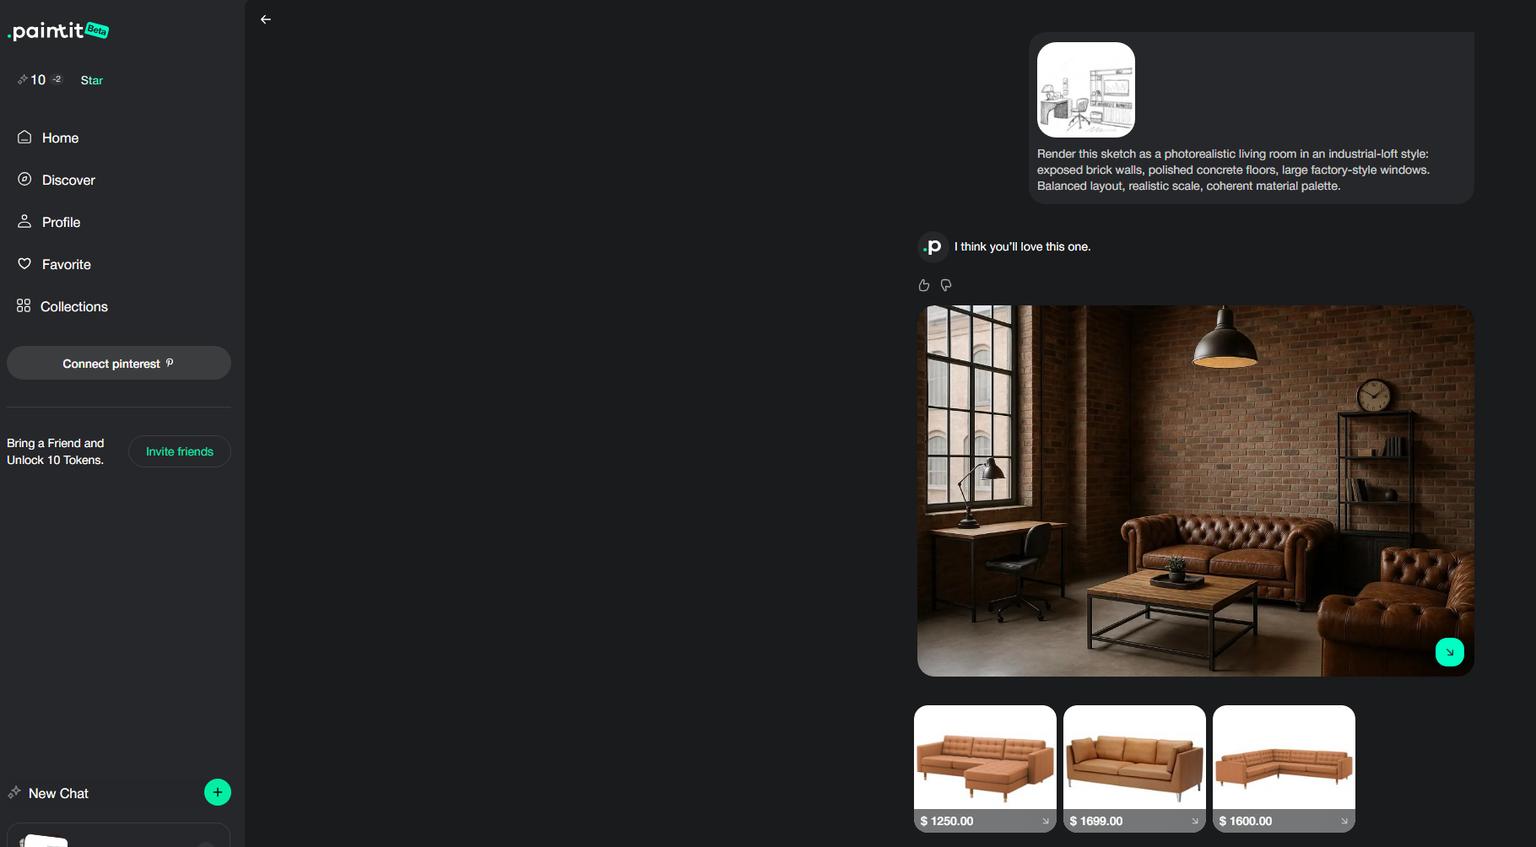
Getting Started with Paintit.ai: Interface & Philosophy
Paintit.ai is built for speed with a simplified interface. The core idea: pick a style the way you'd pick a music track-swap "tracks" to explore aesthetics without wrestling settings. That approach is beginner-friendly and fast to iterate. For pros, it's a powerful front-end for ideation before handing concepts off to technical tools.
Main starting modes:
-
Work with an existing image: Upload a photo of your space and restyle it.
-
Work with an empty room: Ideal for virtual staging-furnish a bare shell quickly.
-
Work with a sketch: Convert a simple floor sketch into a photorealistic concept.
For broader context on what AI room design can do, browse our blog and product pages on AI room design and AI rendering-we'll also link specific tools organically below.
Real-Life Scenarios (Hands-On, Step-by-Step)
The following scenarios mirror common projects. We'll give you starter prompts and iteration moves you can copy.
Full redesign: "Turn my bedroom into a cozy Scandinavian retreat"
Step 1 - Upload the "before" photo.
Clear natural light, a wide view, minimal clutter.
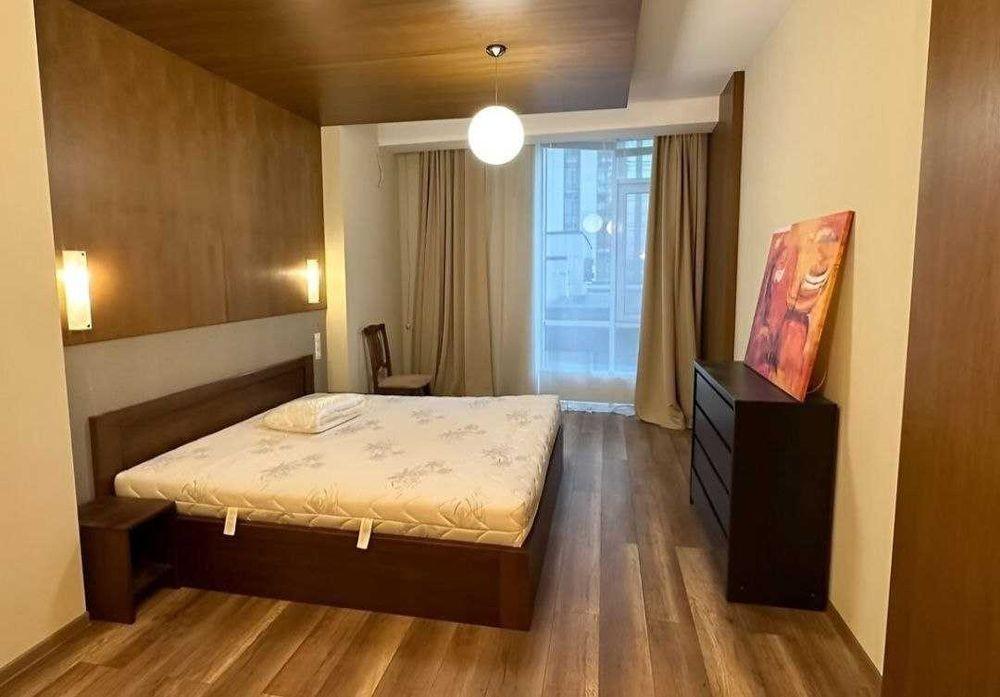
Step 2 - Write a directive prompt.
Full redesign of this bedroom in a cozy Scandinavian style.
Neutral palette (white, light gray). Natural materials: light oak bed frame
and flooring; soft textures (chunky knit throw). Maintain balanced,
functional layout. Soft, diffused lighting. Realistic furniture scale.
Keep existing architectural features.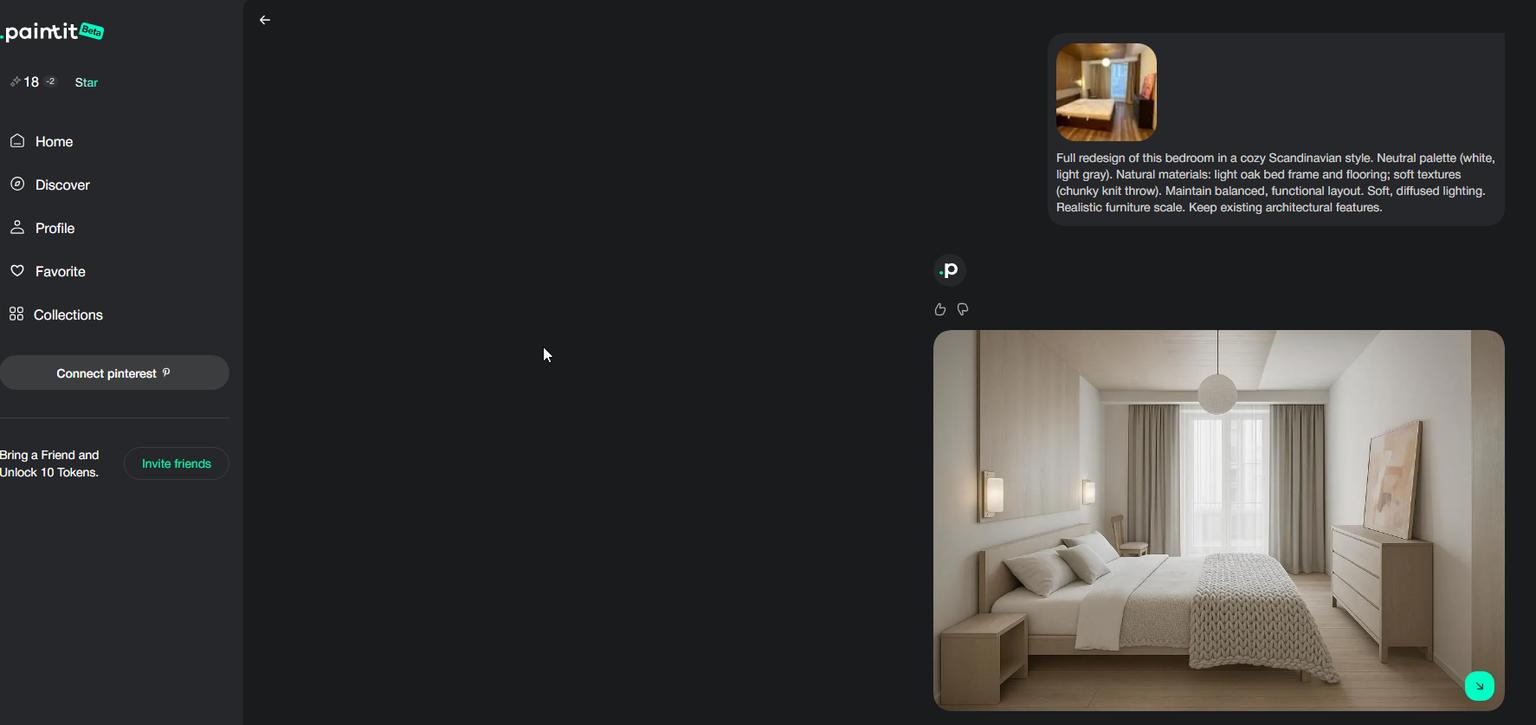
Step 3 - Generate and curate.
Review multiple options. Judge balance, proportion, realism, focal point.
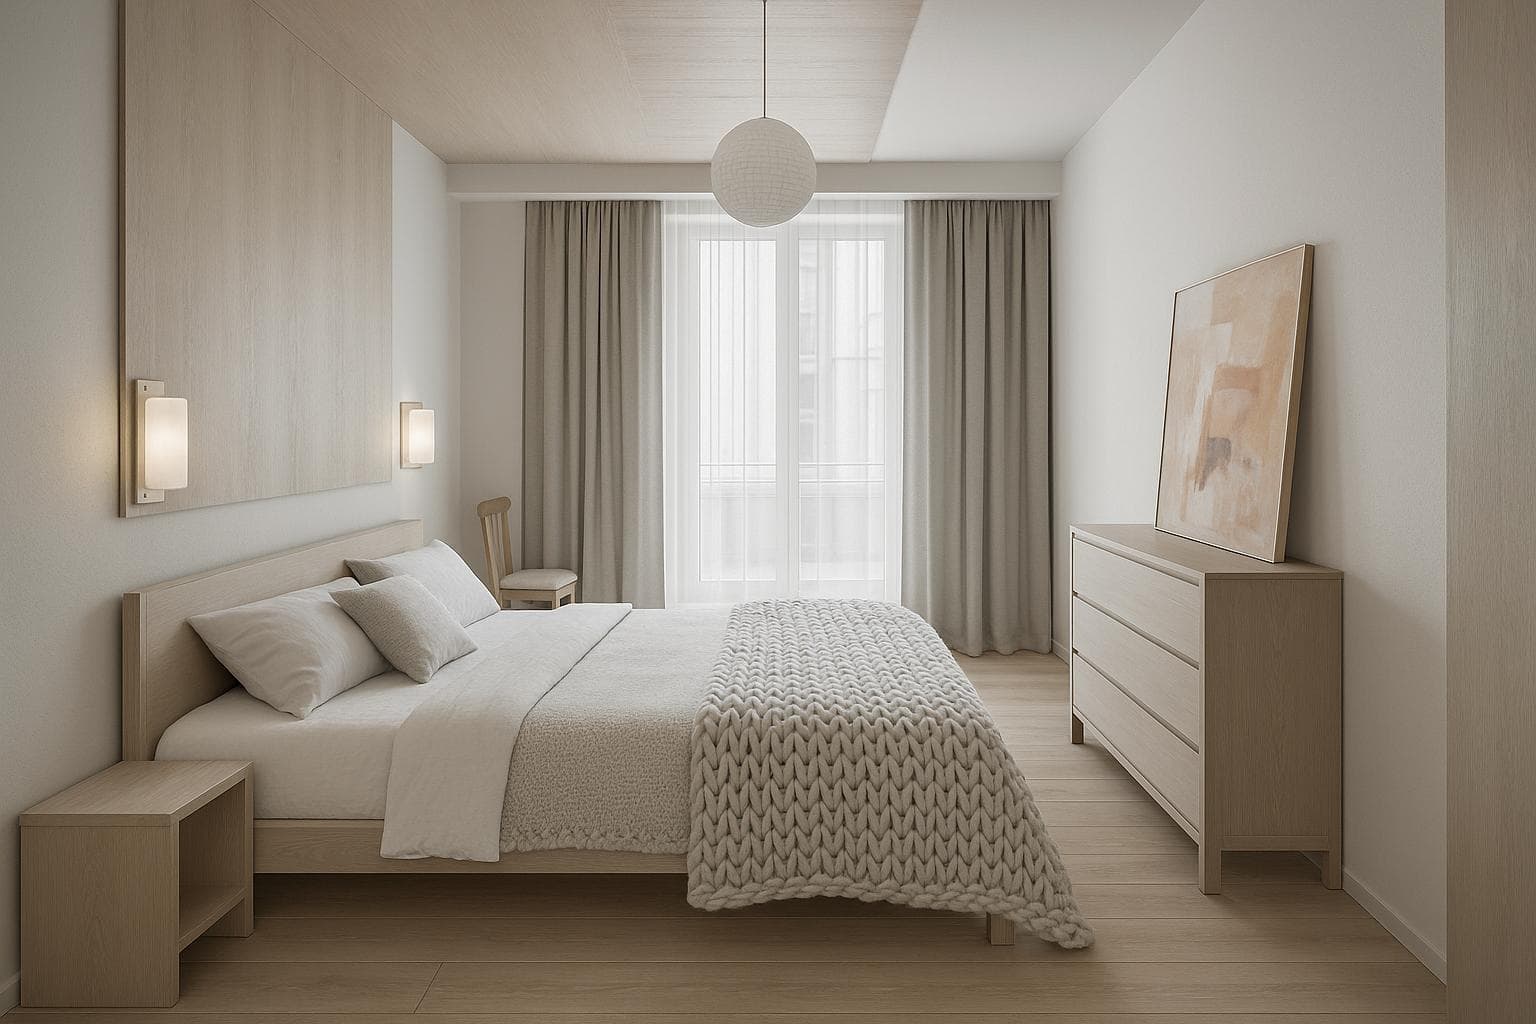
Step 4 - Iterate like a director.
Keep this layout and palette. Add one overscale minimalist abstract artwork
above the bed. Slightly warmer evening lighting, subtle brass accents in fixtures.
Smart guardrails to add at any point
Use realistic dimensions. Preserve existing windows/doors.
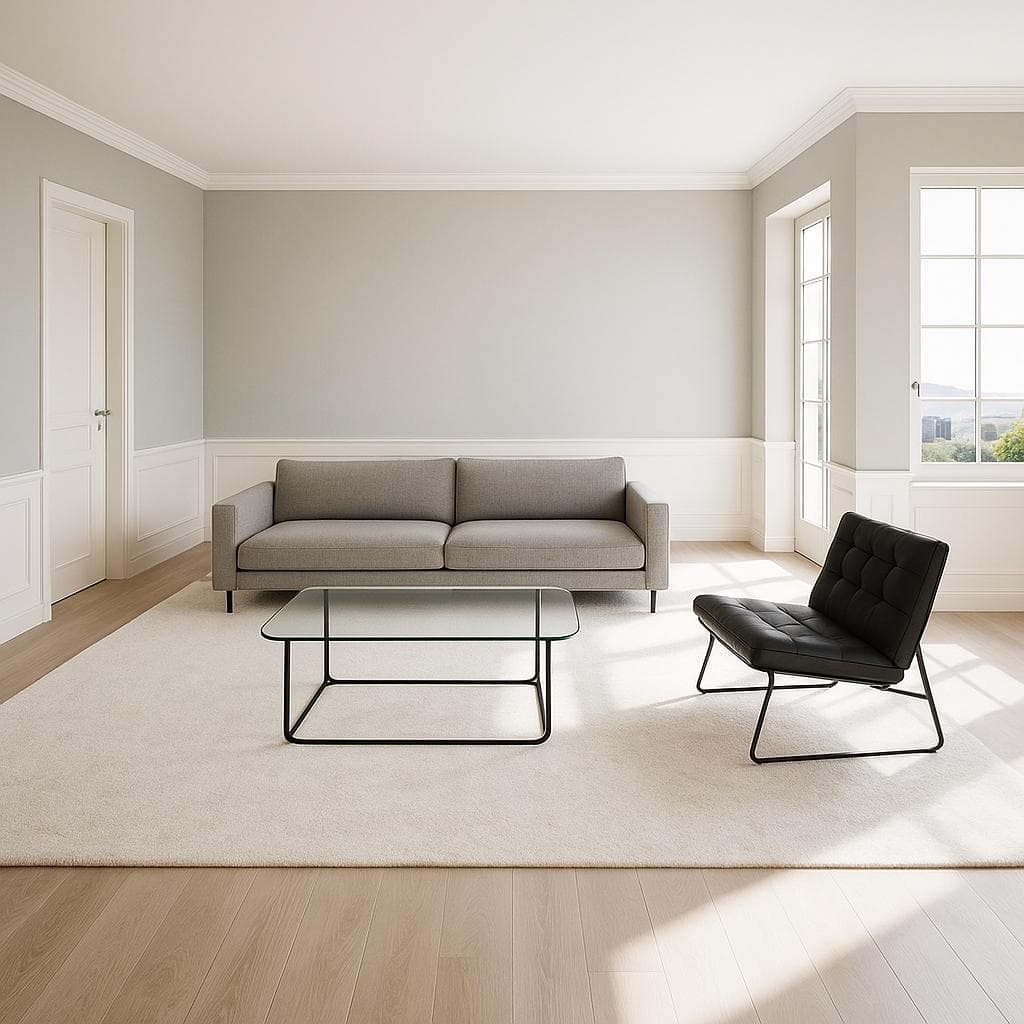
Avoid removing architectural features. Keep walking clearance around the bed. Virtual staging for an empty living room (minimalist, modern)
Step 1 - Upload the empty room photo.
Make sure the architectural envelope is clearly visible.
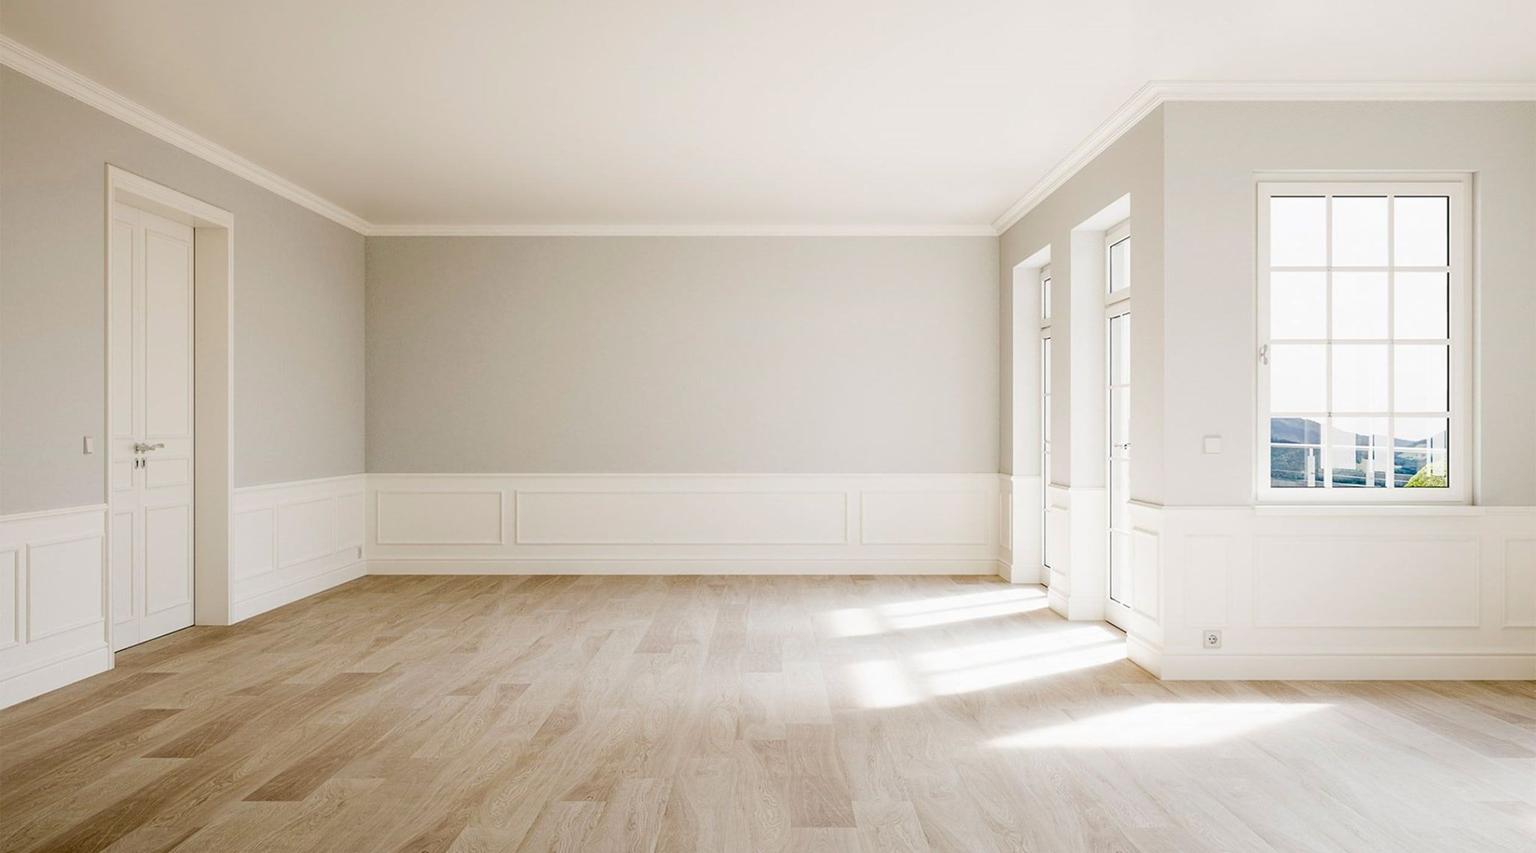
Step 2 - Furnish with precision.
Virtually stage this empty living room with an elegant modern setup:
low-profile gray sofa, glass coffee table, black leather accent chair.
Maintain generous negative space for a minimal feel. Anchor the seating area
with a large, bright rug. Realistic scale; preserve architectural openings.

Step 3 - Iterate for buyer personas.
Version A: Soft neutral palette; add textured linen curtains.
Version B: Bolder contrast (black/white); add sculptural floor lamp as focal point.
Tip: When discussing virtual staging best practices or next steps for real estate assets, you can explore the dedicated page for AI virtual staging and connect concepts back to marketing outcomes.
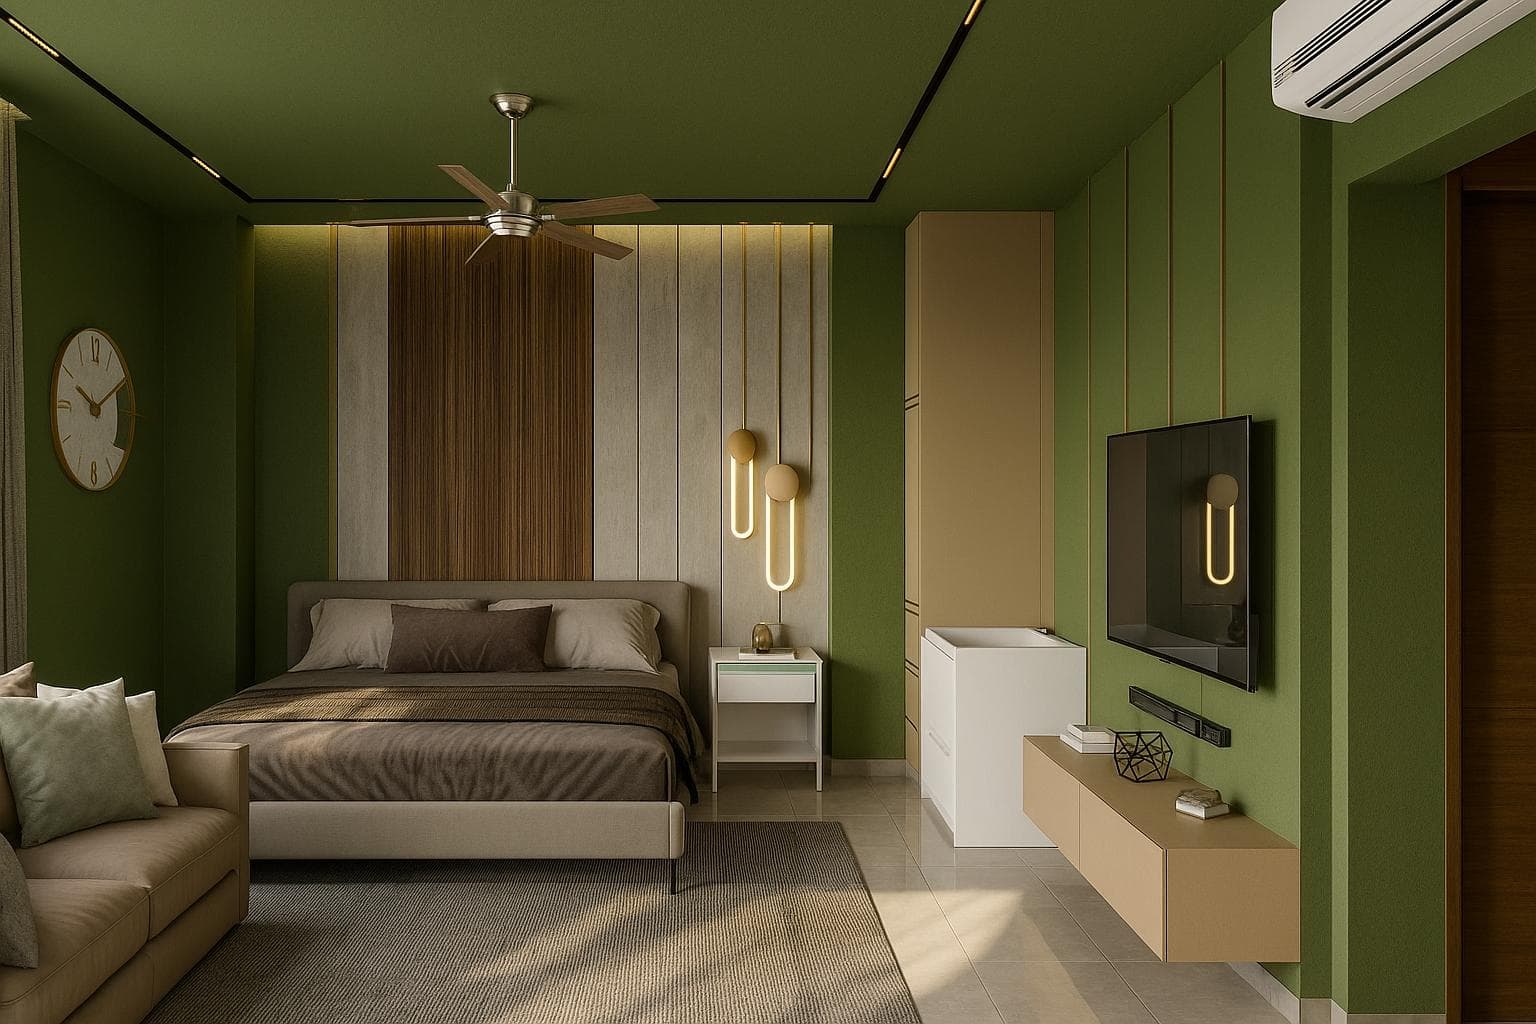
Targeted edits: repaint, replace, add/remove items
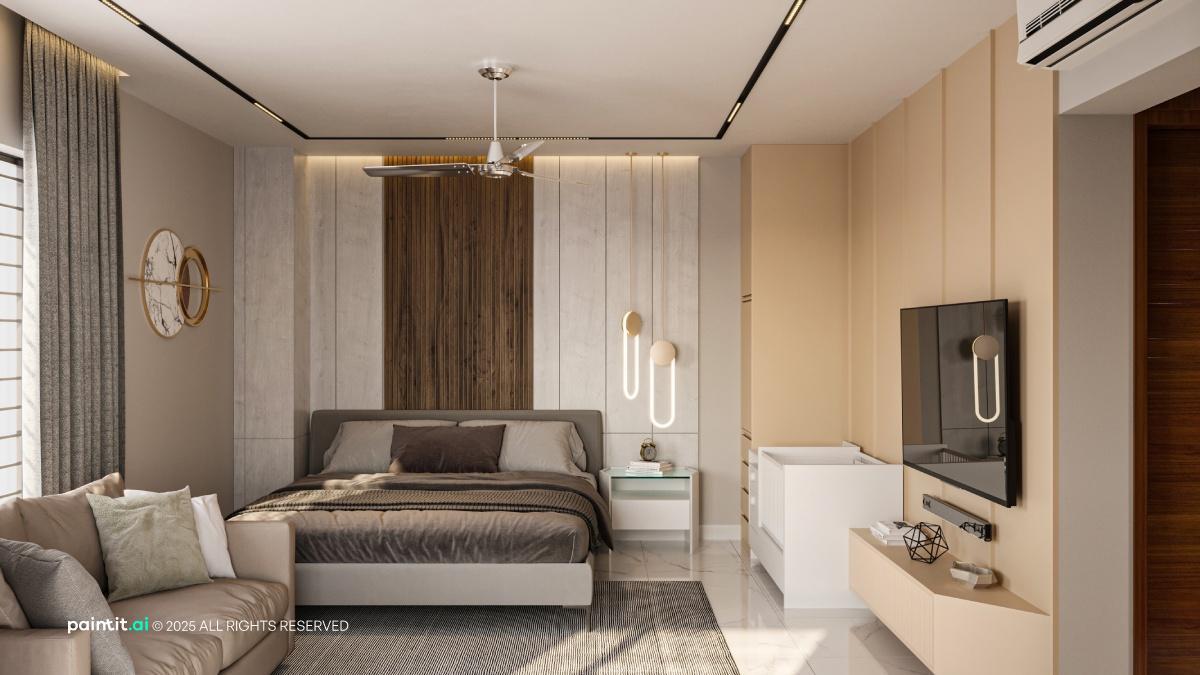
Repaint walls (with masking)
Repaint bedroom walls to olive green. Keep ceilings white.
Respect edges and trim; realistic paint finish under soft daylight.
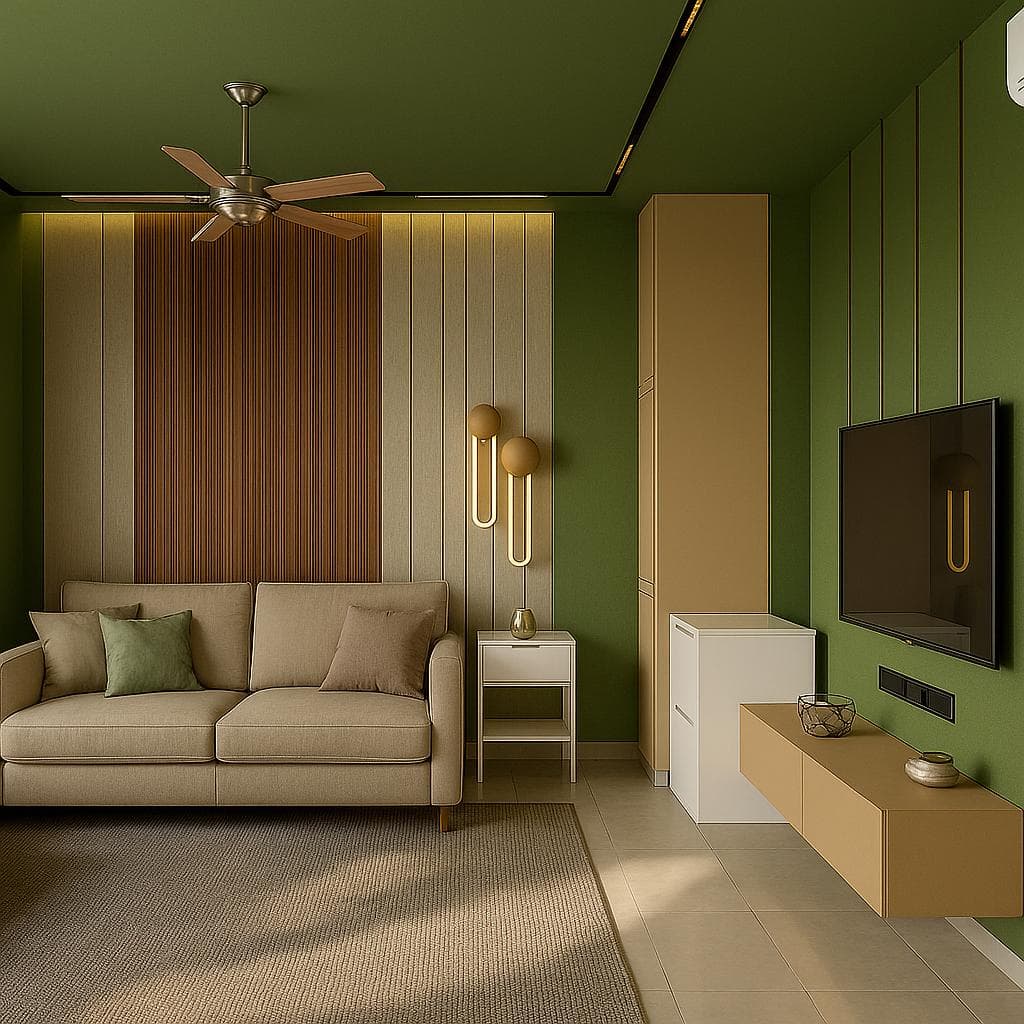
Replace one item (minimize collateral changes)
Replace the bed with a cozy sofa that suits the space.
Keep layout and all other items unchanged. Respect scale and door clearances.
Add a storage piece (precise placement)
Add a storage cabinet to the right of the bed. Match wood tone to existing
nightstands. Maintain overall visual balance; preserve outlets and switches.
Remove all furniture (clean slate)
Remove all furniture from this bedroom to start fresh.
Keep windows, doors, flooring, and lighting intact. 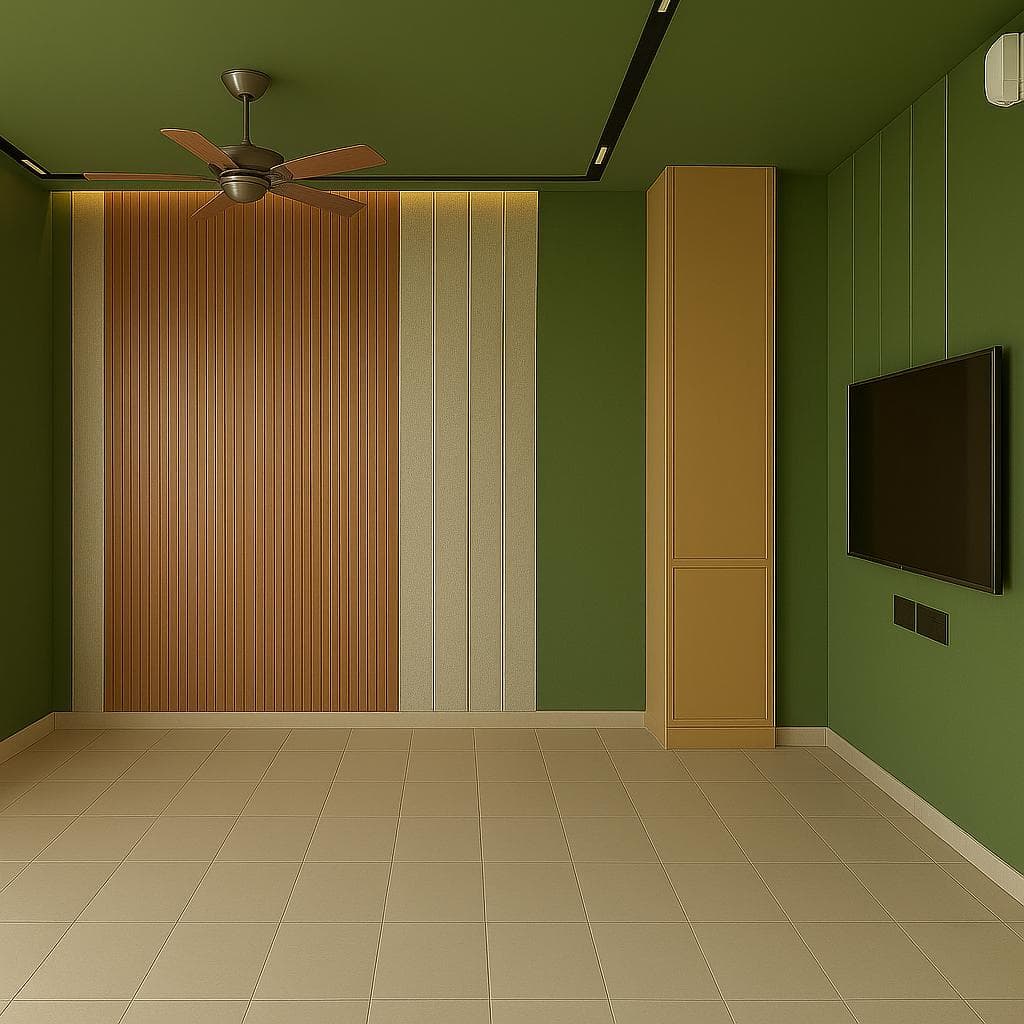
Sketch-to-Design: from hand sketch to photorealism
Step 1 - Prepare the sketch.
Closed, clean lines; label walls and openings.
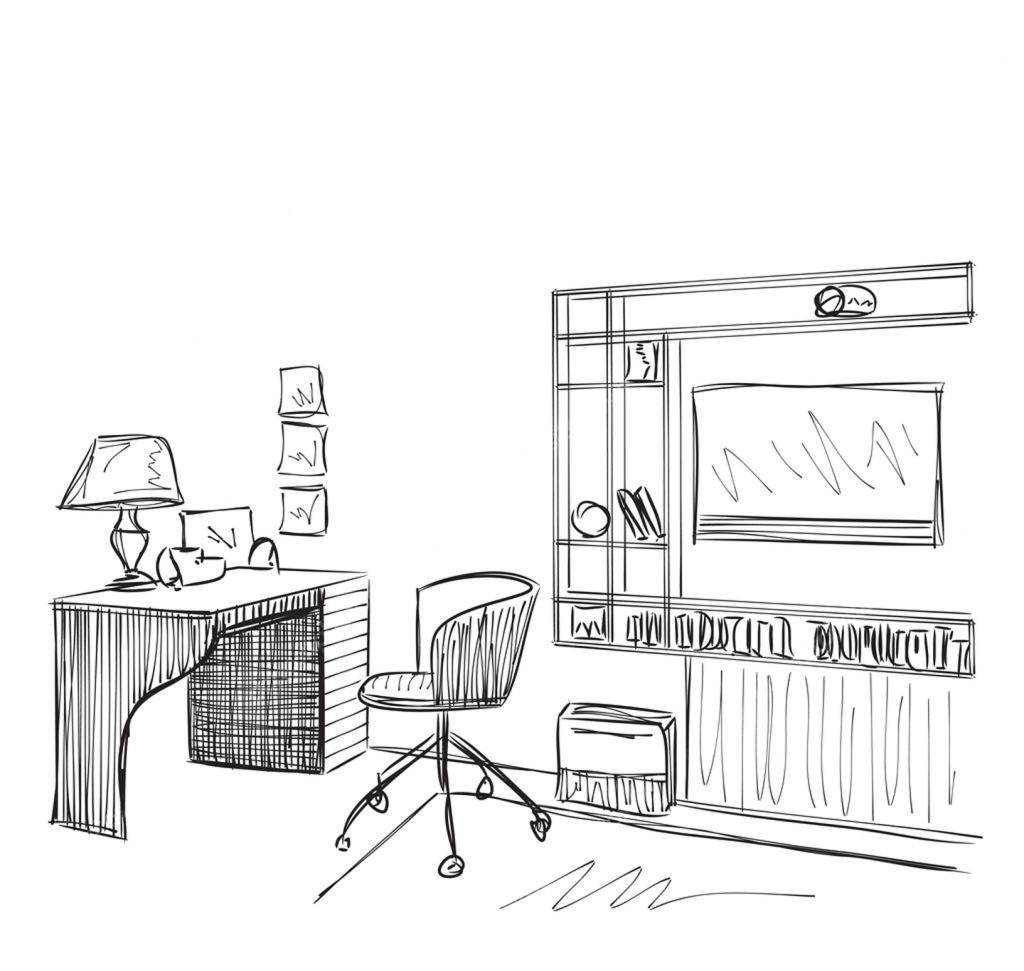
Step 2 - Convert and style.
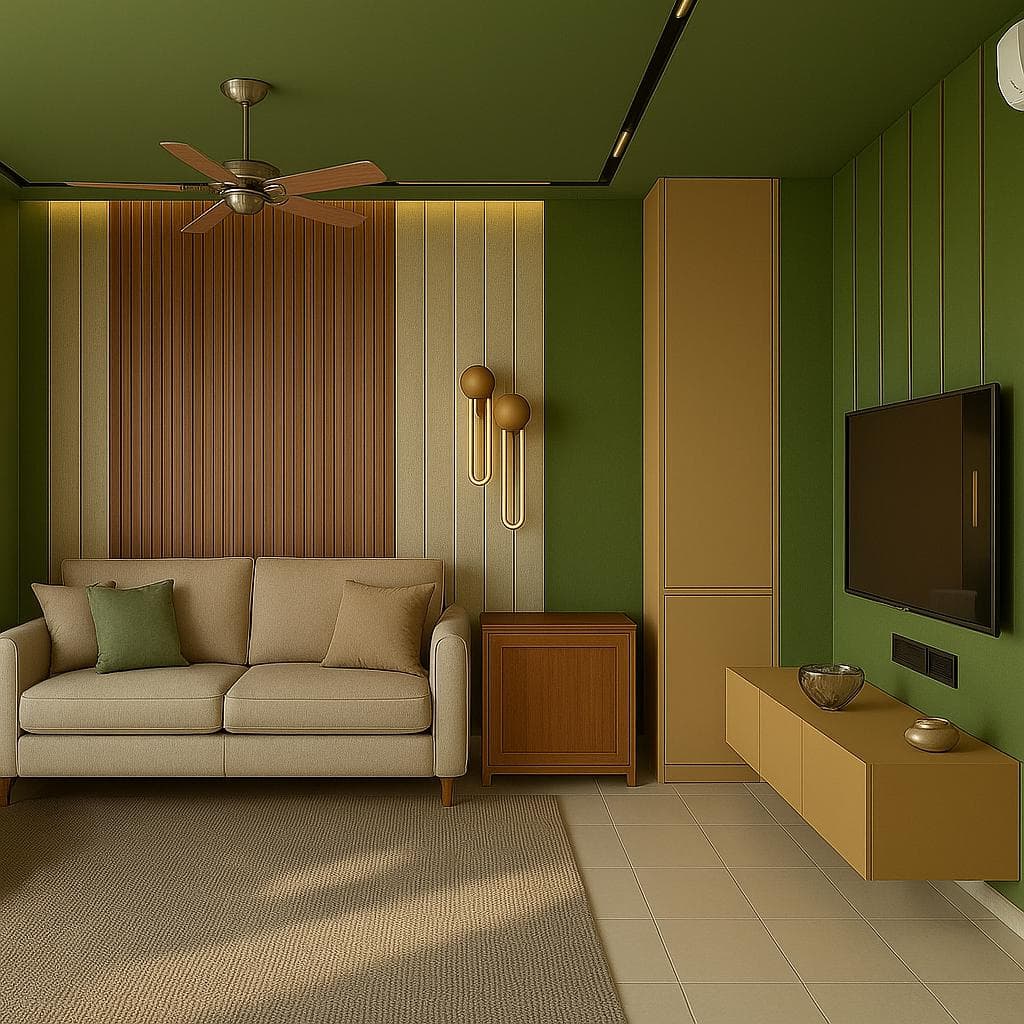
Render this sketch as a photorealistic living room in an industrial-loft style:
exposed brick walls, polished concrete floors, large factory-style windows.
Balanced layout, realistic scale, coherent material palette.
Step 3 - Iterate.
Keep brick and concrete. Introduce a warm leather sofa, add a wool rug
for acoustic softness, and include a plant near the window for vertical balance. 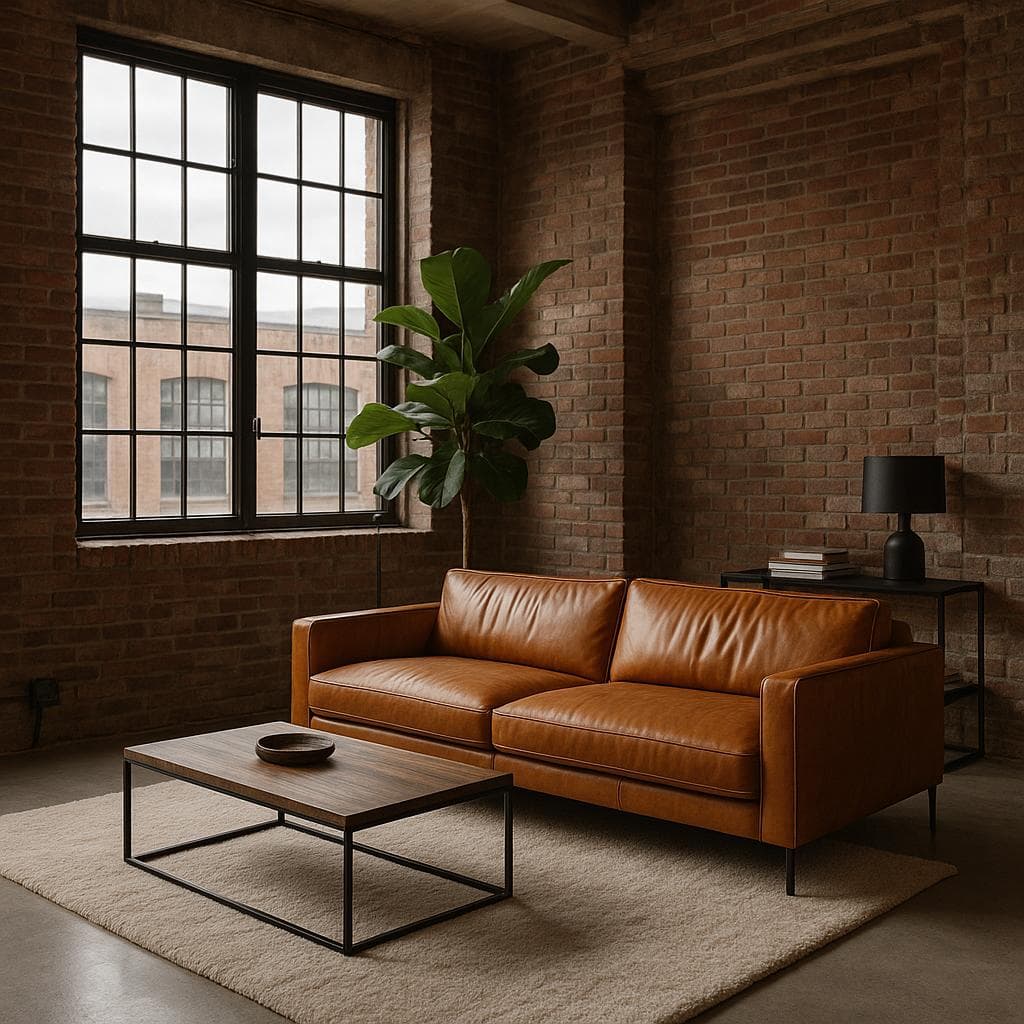
Professional Polish: Spotting and Fixing AI Mistakes
Even strong generations benefit from a designer's eye. Use this checklist to catch common issues early.
Quick evaluation checklist
| Potential issue | What to look for | Fix / prompt guardrail |
|---|---|---|
| Scale & proportion | Furniture too big/small; odd seat heights | "Use realistic furniture scale; keep ergonomic clearance." |
| Architectural integrity | Randomly altered windows/doors; missing niches | "Preserve all existing architectural features and openings." |
| Realism & artifacts | "Franken-objects", warped surfaces | "Use plausible, real-world materials and forms." |
| Functionality & flow | Blocked pathways; impractical layouts | "Maintain circulation; ensure usable clearances." |
| Lighting & physics | Illogical shadows; inconsistent light sources | "Soft, coherent lighting; consistent shadows; no floating light sources." |
Know when to salvage versus restart. If the concept fails at scale or architectural integrity, it's often faster to regenerate with stricter guardrails than to over-edit a flawed base.
Hybrid Pipelines & Portfolio Presentation
Hybrid workflows to level up results
-
Paintit.ai → editor: Use the generated concept as a base layer for small fixes or refined material swaps.
-
Paintit.ai → planner: Translate the visual concept into a precise 2D/3D plan in a dedicated planning tool.
This hybrid approach lets AI accelerate ideation while planning tools ensure technical accuracy.
Building a portfolio that shows mastery
-
Show process, not just final images: include "before" photos or sketches, core prompts, and a few early iterations.
-
Curate hard: Fewer, excellent projects beat many average ones.
-
Provide context: Briefly describe the design objective, constraints, and how AI helped resolve them.
-
Be transparent: State that images were AI-assisted and emphasize your role as the creative director who guided the tool.
For ongoing learning and inspiration, keep an eye on our blog, where we unpack workflows, principles, and fresh prompt strategies.
Prompt Templates (Copy-Paste)
Use these as starting points and adapt to your room, constraints, and palette.
Living room - warm minimal
Redesign this living room in warm minimal style.
Muted neutral palette with one terracotta accent. Low-profile sofa,
glass coffee table, single sculptural floor lamp as focal point.
Asymmetric balance: large sectional (left) balanced by tall plant and gallery wall (right).
Maintain generous negative space; realistic scale; keep windows/doors.
Soft, diffused daylight; consistent shadows.
Dining room - dramatic focal lighting
Transform this dining room with a dramatic focal light.
Center an overscale chandelier above a rustic oak table.
Keep chairs simple to emphasize the fixture. High-contrast surfaces:
smooth white plaster with black oak floor. Maintain clear circulation.
Realistic furniture sizes; preserve all openings.
Bedroom - cozy Scandinavian
Full redesign to cozy Scandinavian. Neutral whites and light gray;
light oak bed frame and flooring; knit throw and linen bedding for texture.
Soft, diffused lighting. Balanced, functional layout. Realistic dimensions.
Keep existing molding and windows.
Home office - functional clarity
Convert this spare room into a focused home office.
Symmetric balance with desk centered on window; task lighting and acoustic panels.
Palette: walnut, olive green, matte brass. Minimal cable clutter; ergonomic chair.
Maintain walking clearance; preserve outlets and switches.
Empty room - virtual staging (modern)
Virtually stage this empty space with a modern, minimal setup:
low-profile gray sofa; black leather accent chair; glass coffee table.
Large bright rug to anchor the zone; generous negative space.
Realistic scale; keep all architectural details intact.
When you need an AI room planner approach for technical drawings after ideation, move your favorite Paintit.ai concept into a planning tool to finalize dimensions and documentation.
Benefits of using AI for room design
-
Speed to clarity: See multiple viable directions in minutes, not days-perfect for aligning with clients or stakeholders early.
-
Better decisions, earlier: Compare style, palette, and layout variations visually, reducing guesswork and back-and-forth.
-
Creative range on demand: Explore "what if?" scenarios (materials, lighting moods, focal pieces) without the cost of full mockups.
-
Principle-led quality: Using design principles inside prompts leads to more coherent, professional results.
-
Granular control when needed: Make small, high-impact tweaks (a single fixture, color shift, or texture swap) instead of restarting.
-
Hybrid readiness: Pair fast AI ideation with precise planning tools to move smoothly from vision to build-ready documentation.
-
Stronger presentations: Document prompts and iterations to communicate intent, rationale, and evolution-elevating your portfolio and client confidence.
Conclusion: Be the Creative Director of Your Space
AI is a partner for exploration, not a replacement for judgment. The difference between average and exceptional results is your ability to translate abstract intent into precise instructions, iterate deliberately, and apply a sharp design eye to what comes back.
Use Paintit.ai to accelerate ideation, test "what if?" concepts in minutes, and keep control through principles like balance, harmony, rhythm, emphasis, contrast, scale, and detail. When you need exact dimensions, hand off to planning tools; when you want visual finesse, refine the winning concept with targeted edits. That's how to use AI to design a room like a pro-quickly, creatively, and with confidence.
To explore more examples and workflows, start at our homepage and jump into tools aligned with your next project.
FAQ
How do I start if my room is messy?
Tidy what you can or remove small items; AI reads structure and light best when the scene is clear.
Can AI match real-world dimensions?
Use prompt guardrails ("realistic scale," "preserve openings," "maintain circulation"). For technical accuracy, move the final concept into a planning tool.
What's the best way to iterate?
Lock the wins (layout, palette) and change one variable per iteration (fixture, sofa, lighting mood) for fast, controlled progress.
Is virtual staging useful for real estate?
Yes-start from an empty room photo, furnish virtually with realistic scale and circulation, and iterate for different buyer personas.
Trending
Is There an App to Remodel My Bathroom with Just a Photo?
How to Use Paintit.ai for Perfect Dopamine Decor Color Combinations
Virtual Staging AI: Top Alternatives & Competitors in 2026
How to Redesign a Living Room with Paintit.ai
How to Save, Compare and Organize Designs in Paintit Projects
Related articles
7 min read
Neo Deco Paint Techniques: Creating Glamorous Geometric Walls
Learn Neo Deco paint techniques for glamorous geometric walls. Explore palettes, finishes, and room-by-room tips — then visualize it all with Paintit.ai.
Yulii Cherevko
CEO paintit.ai
6 min read
Is There an App to Remodel My Bathroom with Just a Photo?
Upload a photo of your bathroom and see it redesigned instantly. Discover how AI bathroom remodel apps work and explore styles with Paintit.ai.
Yulii Cherevko
CEO paintit.ai
7 min read
How to Use Paintit.ai for Perfect Dopamine Decor Color Combinations
Discover dopamine decor color combinations that boost your mood. Explore 4 curated palettes and visualize bold designs in your own room with Paintit.ai.
Yulii Cherevko
CEO paintit.ai
8 min read
Virtual Staging AI: Top Alternatives & Competitors in 2026
Compare top Virtual Staging AI alternatives in 2026: Paintit.ai, Collov.ai, ReimagineHome and more. Find the right tool for your budget and workflow.
Yulii Cherevko
CEO paintit.ai
9 min read
How to Redesign a Living Room with Paintit.ai
Learn how to redesign a living room with Paintit.ai using better layout logic, stronger focal points, realistic furniture scale, cleaner prompts, and more professional comparison workflows
Yulii Cherevko
CEO paintit.ai

8 min read
How to Save, Compare and Organize Designs in Paintit Projects
Learn how to save, compare, and organize designs in Paintit Projects to manage versions better, structure multi-room work, review alternatives faster, and make clearer design decisions
Yulii Cherevko
CEO paintit.ai