6 min. reading

Yulii Cherevko
CEO paintit.ai
Published:

Before you use a tile visualizer, separate three choices: the area you want tiled, the size of the pieces, and their arrangement. Compare those choices with the color held steady. Otherwise, the picture you prefer may have changed the whole tile scheme while appearing to offer a different shade.
Our review of October design chats found requests that specified where tiles should stop, how many rows belonged on different surfaces, and which way rectangular tiles should run. Those details turn a visual preference into a brief you can discuss with a supplier or installer.
We reviewed 40 short English and mixed-language chats about flooring or tile, with one chat per account. Nineteen requested a tile addition or change. Within those 19 chats, we counted the following explicit requirements:
| Requirement in the request | Chats | Decision it helps define |
|---|---|---|
| A specific coverage edge, height or number of rows | 7 of 19 | Where the tiled area ends |
| A laying pattern or direction | 3 of 19 | How the pieces form the surface |
| A numerical tile size, coverage height or row count | 3 of 19 | Which physical dimensions to check |
Categories overlap. A single chat can specify both a stopping height and a vertical layout. These are descriptions of requested designs, not the proportion of all Paintit customers who want each option.
The useful distinction is between changing the material and changing its allocation. A request for a lighter tile does not settle whether it covers one wall or the whole room. A reference photograph does not settle whether its tile size or laying pattern belongs in your space.
A tile edge can meet a shelf, the underside of a cabinet, a window line or the ceiling. The reviewed requests included specific heights and different row counts on different surfaces. Naming only “the wall behind the basin” leaves its upper edge unresolved.
Worked example: a kitchen backsplash. Keep the same cream rectangular tile in both concepts. In option A, show a low band above the counter. In option B, carry the tile to the underside of the existing shelf. Keep the cabinets, worktop, shelf and lighting consistent so you can judge the coverage decision.

Ask where the edge should finish at each end of the run, too. A concept that looks tidy in the middle may leave an unexplained strip beside a tall cabinet or at a return wall. Mark those junctions on a room photo and give them names in your brief.
Our earlier study of painted-area boundaries makes a related distinction for paint. Tile adds a physical module: moving its top edge can also change the number of rows and the cuts that need planning.
Rectangular tiles laid vertically are a different brief from the same tiles laid horizontally. A larger rectangle changes the rhythm again. The October sample included vertical wall layouts, herringbone arrangements and an explicit tile size paired with different row counts.
Worked example: the same wall, two tile sizes. The schematic below uses an idealized 72 × 36-inch panel, approximately 183 × 91 cm. With joints omitted, 6 × 12-inch rectangles form six columns and six rows. Doubling both tile dimensions to 12 × 24 inches leaves three columns and three rows. The color and coverage stay the same, but the visible grid changes.
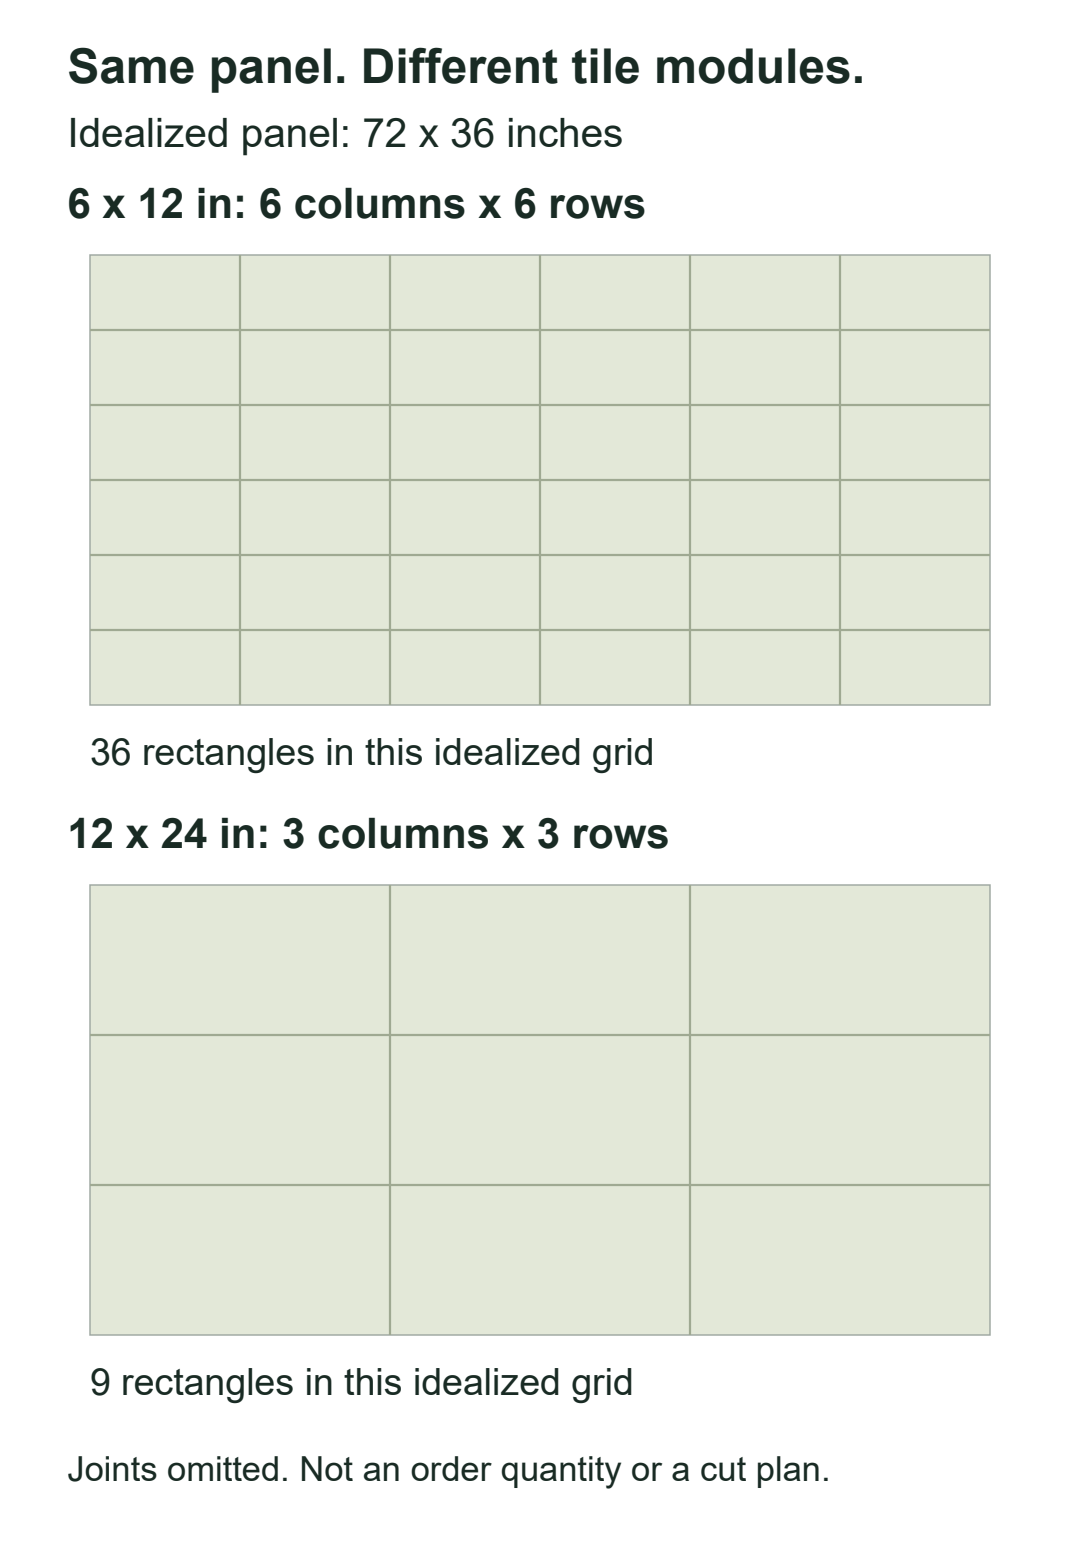
This is a visual scale comparison, not an order quantity. Actual tile dimensions, grout joints and edge cuts affect a real layout. For example, Daltile lists nominal and actual dimensions separately for its Exposition Incognito 12 × 24-inch tile. Check the product you intend to buy.
Compare size first, then direction or pattern using the selected size. If you change all three at once, note that you are judging two complete schemes. You will not know which individual change made the difference.
For floor tiles, Paintit's flooring concepts using your room photo can help you explore the appearance beside existing furniture and cabinetry. Verify the tile grid and proportions separately before taking the concept into a measured layout.
Some reviewed requests used supplied tile references or named products. One chat moved between color combinations, laying arrangements and a set of available tile and cabinet finishes. It illustrates a useful next step: once you have a shortlist, compare the choices you can actually obtain.
Worked example: a bathroom moodboard. You like the deep green in an inspiration image but want rectangular tiles rather than its decorative pattern. Use your bathroom photo to identify the surfaces, the tile sample to specify the material direction, and the inspiration image for the color relationship. State which details each source should contribute.
Keep the vanity finish fixed while comparing two available tile samples. Then compare vanity finishes with your preferred tile. Before ordering, examine physical samples beside the surfaces you will keep. An AI image cannot establish an exact SKU match or the material's appearance under your own lighting.
Complete the card for each surface. If a field is still open, make that the subject of the next comparison rather than asking for another complete redesign.
| Write down | Example entry | Next check |
|---|---|---|
| Surface and stopping point | Back wall, counter to shelf; painted returns | Confirm every edge on the room photo |
| Product and format | Sample A; rectangular tile; supplier dimensions | Check actual size and matching trim |
| Pattern and direction | Vertical straight stack | Confirm the product suits the proposed arrangement |
| Color and finish | Sample A beside the existing oak and worktop | View physical samples in the room |
| Grout and exposed edges | Joint color and edge finish still to choose | Agree product-specific details with the installer |
| What stays | Cabinets, shelf, counter and room layout | Check the preview for unintended changes |
Open the printable tile decision card. The worked examples and diagrams in this article are editorial reconstructions, not customer images or verified Paintit outputs.
For a shower or wet floor, have the supplier and installer confirm suitability, slip resistance, waterproofing and drainage independently of the visual choice. A convincing image does not answer those installation questions.
This AI-assisted editorial review examined chats submitted in October 2026. We screened for flooring and tile wording, selected one short chat per account in a fixed order, and reviewed 40 English and mixed-language chats. Nineteen contained a tile addition or change. We excluded recognizable scripted scenarios and interface payloads. The selected sample describes submitted requirements, not market trends or completed renovations.
A useful tile concept should let you name what you prefer: the color, the module, the arrangement or the coverage edge. Use separate comparisons to settle each open choice, then put the selected product and surface instructions on your decision card. That gives the supplier or installer something more specific to review than a favorite picture.